The assignment was simple - Make a quilt from old baby clothes.
The tricky part - Not one, not two, but three quilts.

Getting the fabric ready for a t-shirt (or onesie) quilt is a slow, labored process.
The painful (for me) part of the whole process is cutting up perfectly nice and cute baby clothes. It generates a lot of trash - seams, buttons, zippers and oddly shaped fabric slivers.
The tedious part - interfacing each piece of salvaged fabric. This is slow, because I cannot hurriedly iron over it. Holding the iron down in each section for 8-10 seconds is a must to ensure that the interfacing adheres to the fabric properly. This is followed by squaring each of the above interfaced pieces. And only then can I start to piece.
SF101 is a must. Design wall is a savior. And most importantly patience is a virtue.
But let's get to the fun part. The finished quilts. These are the three quilts for three siblings (or musketeers).
Quilt #1
Quilt #2
Quilt #3
If you choose to make a t-shirt quilt or a quilt from onesies and baby clothes, these are a few important things
1. Use a walking foot even for piecing because the knit fabric + interfacing = bulk.
2. Press ALL seams open.
3. Use a wider binding. Instead of using 2.5" strips, I suggest using 2.75" strips. A little extra width helps capture those bulky seams with ease.
But quilts is not all I made from the baby clothes. I knew I would have fabric left over for three small pencil cases - one for each musketeer.
Also I had plenty of fabric to make three pillow covers. I chose to use binding to finish, instead of just stitching RST and turning it inside out. Yes, it takes more work but I wanted to do the very best for this mom of three.
I had a feeling that if the pillow covers did not have a pillow form inside, they may just be sitting in a closet and not get used. To make sure that items could be used instantly, I bought pillow forms and inserted in each of the covers. Besides fluffy pillows also look better in photoshoots :-D
Is that all? Well, almost.
Still some pieces were left and they were too precious to discard, since they already had the interfacing. So, I finished off with a few mug rugs.
I was paid handsomely for all my efforts. The best part, however, was the smile on mom's face.
Mission Accomplished.
I will be linking with all my favorite lanky parties. As always, I'd love to hear from you.
Which one is your favorite quilt?
The tricky part - Not one, not two, but three quilts.

Getting the fabric ready for a t-shirt (or onesie) quilt is a slow, labored process.
The painful (for me) part of the whole process is cutting up perfectly nice and cute baby clothes. It generates a lot of trash - seams, buttons, zippers and oddly shaped fabric slivers.
 |
| Aligning fabric pieces on SF101 |
The tedious part - interfacing each piece of salvaged fabric. This is slow, because I cannot hurriedly iron over it. Holding the iron down in each section for 8-10 seconds is a must to ensure that the interfacing adheres to the fabric properly. This is followed by squaring each of the above interfaced pieces. And only then can I start to piece.
 |
| Design Wall for Layout |
SF101 is a must. Design wall is a savior. And most importantly patience is a virtue.
But let's get to the fun part. The finished quilts. These are the three quilts for three siblings (or musketeers).
Quilt #1
 |
| Finished about 41" by 44" |
 |
| Personality Plus |
 |
| Fly away |
 |
| Hop to it |
 |
| Dude with 'tude |
 |
| All cuteness |
 |
| Wild one |
 |
| Bold & Boyish |
 |
| Polar Bear backing from Hawthorne Threads |
 |
| Walking Foot Quilting |
Quilt #2
 |
| Finished about 43" by 46" |
 |
| Bird & Beautiful |
 |
| Pink and Pinker |
 |
| Aw... |
 |
| Brightest Slippers ever |
 |
| Rooting for the team |
 |
| May the best team win |
 |
| I love you too |
 |
| Fluffy Plus |
 |
| Sweetness |
 |
| Cuteness |
 |
| Brightness |
 |
| Loveliness |
 |
| Labelled |
 |
| Walking Foot Quilting |
 |
| Finished about 41" by 42" |
 |
| Snappy |
 |
| So much fun |
 |
| Puppies and Turtles |
 |
| Adorable |
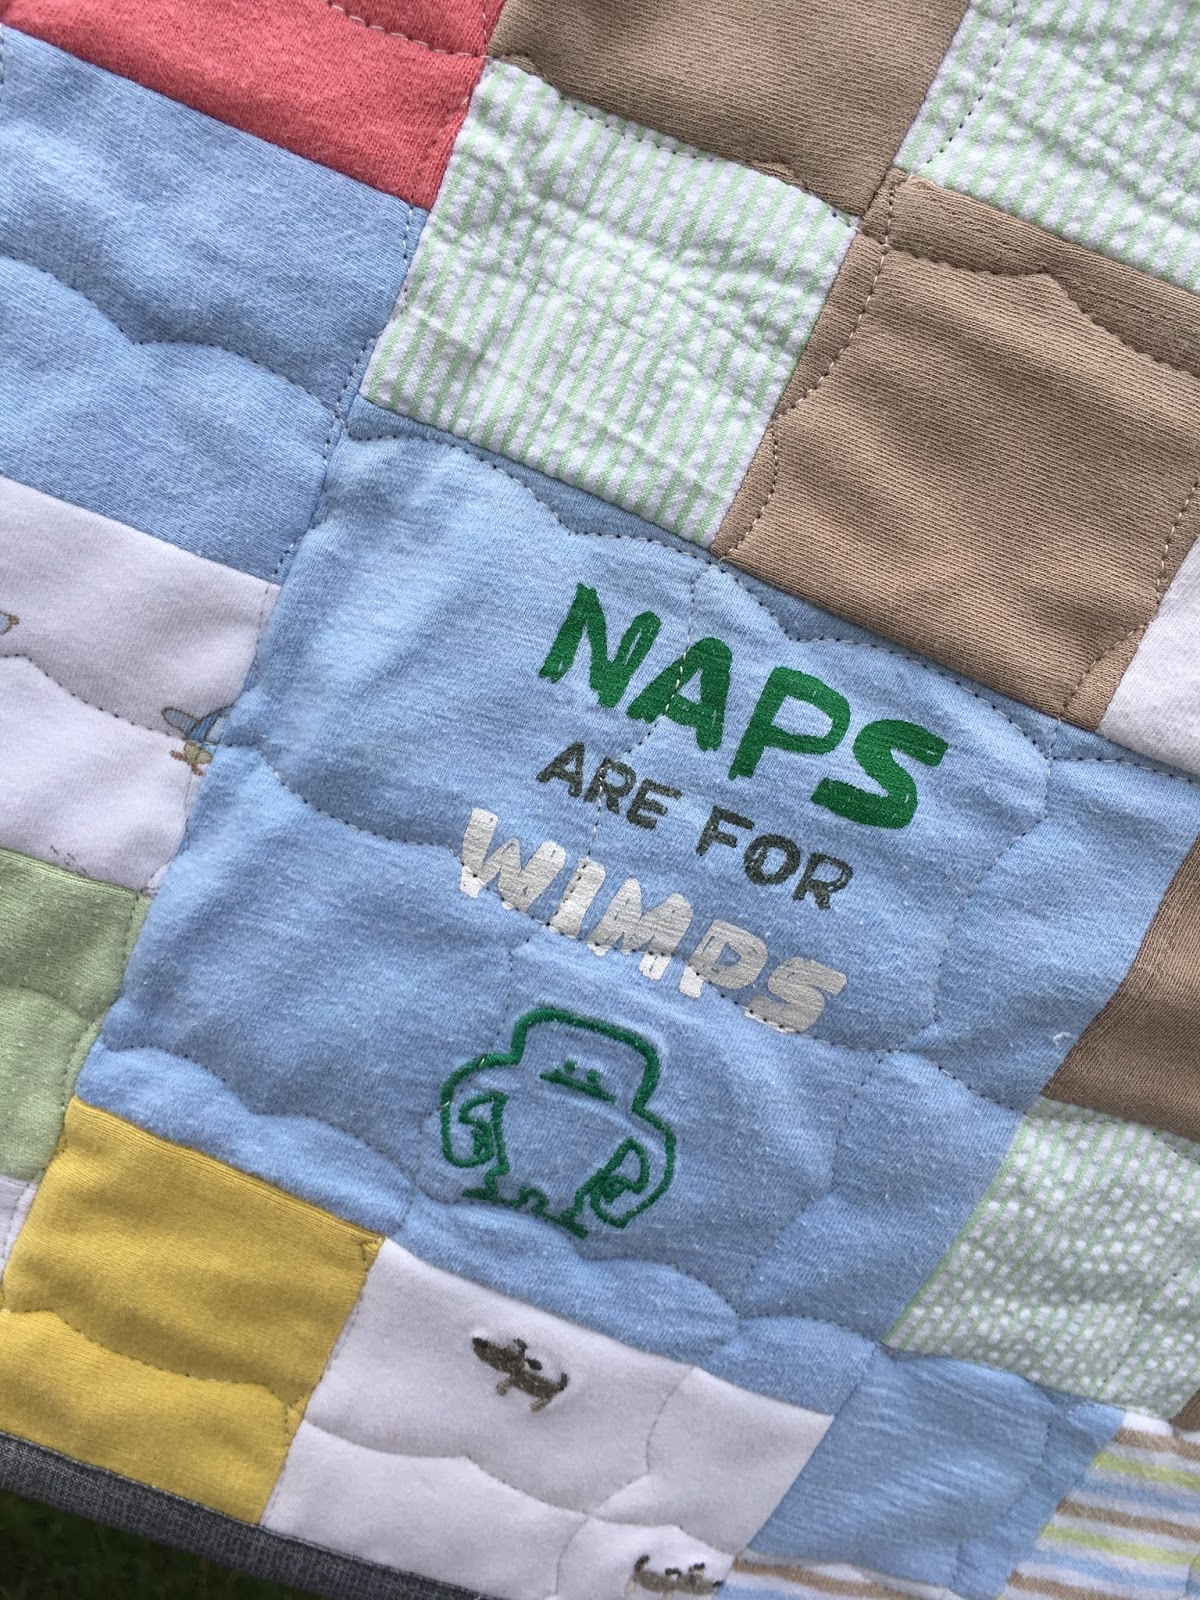 |
| And I am no wimp |
 |
| Orange, Coral and Yellow - Love the colors |
 |
| Monkeys make everything better |
 |
| A baby elephant adds to the charm |
 |
| Yay for the team!!! |
 |
| Navy & Starry Backing |
 |
| Walking Foot Quilting |
 |
| Bound and Done |
If you choose to make a t-shirt quilt or a quilt from onesies and baby clothes, these are a few important things
1. Use a walking foot even for piecing because the knit fabric + interfacing = bulk.
2. Press ALL seams open.
3. Use a wider binding. Instead of using 2.5" strips, I suggest using 2.75" strips. A little extra width helps capture those bulky seams with ease.
But quilts is not all I made from the baby clothes. I knew I would have fabric left over for three small pencil cases - one for each musketeer.
 |
| Three Pencil cases for Three Musketeers |
 |
| Ready for Stuff |
Also I had plenty of fabric to make three pillow covers. I chose to use binding to finish, instead of just stitching RST and turning it inside out. Yes, it takes more work but I wanted to do the very best for this mom of three.
 |
| Three Pillow covers |
 |
| Pink Binding |
 |
| Envelope Style |
 |
| Soft and Ready to Cuddle |
Still some pieces were left and they were too precious to discard, since they already had the interfacing. So, I finished off with a few mug rugs.
 |
| Mug Rugs |
 |
| And a very good morning to you!!! |
I was paid handsomely for all my efforts. The best part, however, was the smile on mom's face.
Mission Accomplished.
I will be linking with all my favorite lanky parties. As always, I'd love to hear from you.
Which one is your favorite quilt?


