Sunday, April 20, 2014

Mistake? No. Scenic Route YES!!!

"Oh, you took a wrong turn, honey."
"No, sweetheart. We are taking the scenic route!!!"


Have you ever taken a wrong turn? But then eventually found your way back to the destination via a scenic route? I have. Many times.
Today I want to share with you this fantastic finish - A Walk in the Park Quilt for a sweet four year old darling girl. The pattern is from Ellie Roberts @ Craft Sew Create from Craftsy.

First, look at the back of the quilt.


I love how the floral print is framed by the dark purple border. But the journey to this gorgeous destination of a quilt was a "scenic" one.


Once I completed the quilt top, I made the quilt sandwich - Top, Batting and Backing - and spray basted it. Once everything was ready to be quilted, I realized my mistake. The backing was not straight, and it was smaller than the batting/top. Oh no!!!

Front - looks fine

Back - Far from fine :-(


Two choices
1. I could either take the backing apart, find new backing (this was not enough) or add another piece to it and redo the whole thing. UGH!!!
2. I could be creative. AHA!!!

What if I added a border to the quilt back? Yes, I could do that.
Without removing the current backing? Yes, I can quilt as you go!!!
EUREKA.


So, I cut 2.5" strips from a bright purple fabric and joined them to have adequate length. I then placed the purple border strips right side down, 2" away from the edge of the quilt sandwich. I pinned it in place and stitched it, flipped it and ironed it.


Here is the result.
The new Back (rescued)
The "quilt as you go" stitch line in the front
Yes, it resulted in a new quilt stitch line in the front, but I can live with that. It is not straight - I am fine with it. Since it was already quilted, all I had to do was binding and then hand stitch the label.


I feel so triumphant. I not only saved myself from some hair-pulling moments, I saved the quilt and discovered a new way to correct my mistakes. Remember there are no mistakes. Only opportunities for learning and improvement.

Finished Quilt - A Walk in the Park

How did you recover from a wrong turn? I look forward to hearing from you.
Linking up with Throwback Thursday.

Sunday, April 13, 2014

Four Patch HST (Boston Block) Tutorial

When I met Zoanna for the first time, she shared with me her love of pinwheels. She said "I just love the movement of the pinwheels. If I had to choose just one pattern to make for the rest of my quilting life it would be pinwheels."

Look at this, this is what I want to make next.
Please don't. At least, not yet.
Why not?
Because, I promise I can show you a simpler, quicker and cleaner method of making these blocks.

Zoanna agreed.

Here is me delivering on my promise. The block is called Boston Block, I think. I am going to call it Four Patch Half Square Triangle block. Here are the steps with pictures.


 4-PHST
Fabric Requirements

  • 4 charm squares - dark color
  • 4 charm squares - white or other pale/neutral background color
  • 2 squares - 9.5" by 9.5" of lighter color


1. Make two identical four patch blocks, using the charm squares.


 Place right sides together.

 Chain piece.

Open, iron and chain piece again.


Our two 4-patches are now complete. They measure 9.5" square.


2. Now, place each lighter blue square right sides together with the 4-patch. Stitch on all four sides using a quarter inch seam. 


 3. Now, this is the exciting part. Cut the stitched 4-patch + lighter blue square on the diagonal, from corner to corner both ways. See picture below.


Open the fold and see the magic :-D Neat, isn't it?
That is a Boston Block or 4-PHST


Open all four of them. Set aside.
Cut the other 4-patch + lighter blue square in the same way.


And open them too. Now, you will have eight 4-PHSTs. Here is the important thing - Four of them look alike and the other four are mirror images. See picture below. 


Each 4-PHST measures 6 1/4". You can square them to 6". This is a good time to starch and iron the blocks and start playing...
Here are some of the ways you can put this block together...

I love this twisty block :-) Looks way more complicated but was so simple.

Another variation

Look at that S-pattern - like the movement of the colors...

Look at this - zig zag with pizzaz...


Here is my new favorite...If you look hard, you can see the 3-dimensional effect of a cube.


And here you are, for Zoanna, the PINWHEELS, whee...

These 8 Boston Blocks will give you two pinwheels - one going clockwise and one going anti-clockwise.  Remember, you need to make these in pairs because one set will give two blocks of one kind and two that are mirror images. You need four of a kind to make one pinwheel.

Reasons to love this method
1. It is FAST. You get eight blocks at once.
2. You only cut once per block.
3. Reduces bias.
4. Does not require any special rulers.

If you liked this tutorial, please leave me a comment. Your comments make my day - they are like an e-pat on the back :-)

Thursday, April 3, 2014

Staying Organized - That is Nifty!!!

The word of the day is...

nif·ty [nif-tee]  

adjective, nif·ti·er, nif·ti·est.
1. attractively stylish or smart: a nifty new dress for Easter. 
2. very good; fine; excellent: a nifty idea. 
3. substantial; sizable: We sold the car for a nifty profit.


Have you been to the Container Store?
   No?
Well, you have no idea what you are missing. The Container Store is fabulous. They have LOTS and LOTS of storage and home organization solutions. Look what I found...
   An ice cube tray?
Yes.
   So?
It has a lid!!!
   I see that.

Yes, but you don't see the solution.
     Solution? Solution to what? I did  not know there was a problem.

I wanted a simple, covered bobbin storage device that was cheap and easy to store. And I found it in an ice cube tray!!! It stores 21 bobbins and can also make ice cubes!!! Now, that is nifty. Most importantly, I paid a whopping $4 for it.

Ok, I know Jo-Ann has something similar for the same price but would you look at the cool design!!! I can also use it to make ice cubes - if needed :-p


I have also been working on a very special quilt for a darling little girl. Here she is - totally CUTE. She turns four this month and I am hoping that I can complete a quilt, in her favorite colors (Pink and Purple), in time for her birthday.


I found the free pattern on Craftsy. Craftsy is one of my favorite resource for patterns, inspirations, classes and more. What I really love about Craftsy classes is this - your access never expires. Once you take a class, you have it for ever. And that is super nifty!!!


So, back to the pattern. It is called "A Walk in the Park" by Ellie Roberts @ Craft Sew Create

It is a simple, beautiful and eye-catching pattern. The original was in pastel colors but you know me - I love bright colors - hot pink, bright purple and dark orange. 


Here is another look at it...

See the little pink sticky notes?
Trying to maintain order and SANITY (be it bobbins or quilt block rows) is the eternal challenge...


Thursday, March 27, 2014

Alex (with Instructions)

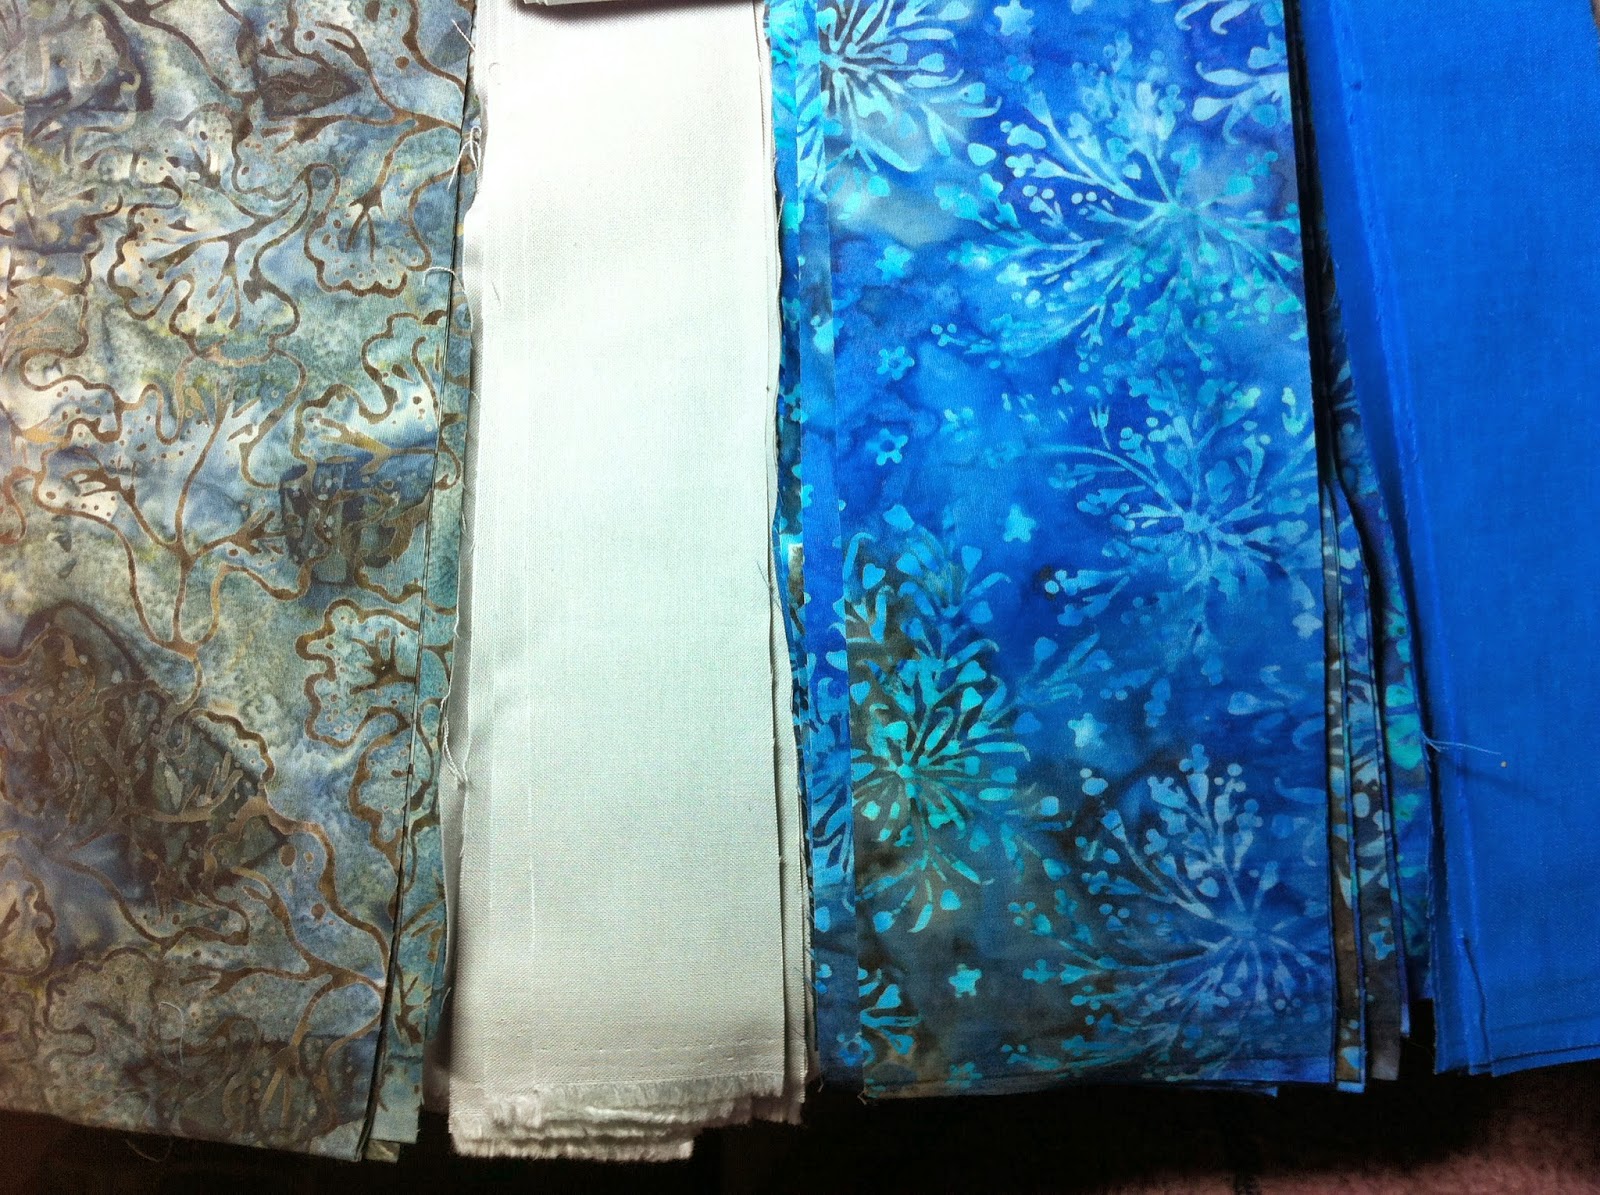
Alexander is the name of my stepson. His birthday is on February 15 and he turned 20 this year. He lives in Arizona and visits us from time to time. This year, I decided to make him a quilt for his birthday. Very carefully, I chose fabrics and decided on a rail-fence pattern. I knew he wanted a blue quilt. So blue was essential and I added a bit of grey. I chose batiks and matching solids.


If I were to make this exact same quilt again, I would choose a darker shade of the solid grey. It seems to stand out just a bit more than the other fabrics which all seem to blend well with each other. If you are reading this and you are a quilter, you know we are always more critical of our work than anyone else.


Just in case, someone wants to replicate this design, the Rail Fence fabric requirements and block dimensions are as follows:

Fabric Requirements
  • Blue Batik - One and a half yards
  • Grey Batik - One and a half yards
  • Blue Solid - Half Yard
  • Grey Solid - Half Yard
  • Border - One yard
  • Binding - Five Eighths of a Yard (about 20")
  • Backing - 2 yards of 108" wide backing fabric. 

Cutting the Fabric/Making the Blocks

Blue Batik - Cut into strips 3.75" (3 and 3/4 inches) by the width of the fabric (WOF). You will need 14 strips.
Blue Solid - Cut into strips 2" by WOF. You will need 7 strips.
Stitch them together (using a 1/4" seam) with Blue Batik fabric on either sides of the solid blue. The strip should be 8.5"wide by WOF. Cut into squares. The block will measure 8.5"square and look like this.


Repeat the same process for the Grey Batik/Grey Solid blocks.
You will need a total of 70 blocks - 35 blue and 35 grey. The blocks are arranged 7 by 10, see picture below. Make sure that all blue blocks are arranged horizontally and all grey blocks are arranged vertically. That will give the weaving pattern in the quilt.

The border measures 4". The finished quilt measures 64" by 88" - a twin size.

Here is the quilt top, basted. It covers a large part of my dining room floor.

See, what I said about the solid grey standing out a bit too much :-(
I used Warm & Natural Batting and I quilted it on my Janome using my favorite "stitch around the ditch" method.

Here is the finished quilt.


Paul is standing on a chair holding the quilt so that I could take a picture :-)

Here is the detail of the quilting.

And here is the label - "ALEX"

When I started quilting, the size of the quilt was somewhat of a problem and made by neck and  shoulders hurt. As I was finishing the binding, the bobbin ran out of thread. It was just a tad frustrating trying to finish this quilt. And for all these reasons (FRUSTRATION and PAIN), I decided to change the name of the quilt from "Alex's Quilt" to just plain "Alex". I love Alex and he is a fine young man but he can be a challenge. 

Kids do not come with instructions. 
Aren't you glad that I am including instructions with "Alex"?


Friday, March 21, 2014

A snow perfect day

On Sunday, I got to meet a fellow quilter and blogger - Zoanna. I so enjoyed our meeting.

I picked fabrics for a friend's quilt. And she approved my choice of fall colors for a Log Cabin Quilt. Here they are.


Monday March 17, 2014

I got up to see over 8 inches of snow on my car. Since my husband can work from home, and he was "working" when I got up, shoveling the driveway and cleaning the cars was neither a requirement for him nor his priority. He was in the middle of a work emergency while he was in his jammies.

What is a girl to do? Hey, I am a big girl, and I can take care of myself, my driveway and my car. So, I did. By the time I finished shoveling and cleaning, I was in no mood to go to work. I called my boss and took the day off - PTO.

And now I could sew to my heart's content. Yippee!!!
Time for a new project. I started and finished a not so small zippered pouch. 


I had not made these bags in a while and I feel I need more practice maneuvering the zipper foot. Speaking of the zipper foot, I had the zipper foot from my old Brother sewing machine and of course the zipper foot from my new Janome. In my zeal, I did not bother to check which zipper foot I was using. It was only after I broke two needles, did I realize the folly of my ways. I found the correct zipper foot and manged to complete the assignment. Phew! another lesson learned, another day!

I still had some time left. So I finished a few things. I completed the Whirlygig Quilt.


I also completed the rail fence quilt for Alex (post coming soon).

Look at Jonesie, inspecting the quilt. No, it is not for you!!!

So all in all a terrific day. Shoveling snow was good exercise. Exercise releases endorphins. Endorphins make me happy. Happy wives makes happy husbands.  Happy husbands support their wives and let them sew and quilt in peace. Amen!

Wednesday, March 12, 2014

Fabric has a mind of its own...

Fabric has a mind of its own. Believe me it does. You can measure it several times, starch it and iron it and use precise cutting tools and fancy precision rulers. Yet, it will still shift and taunt you.
Don't get me wrong. All those things - rulers, tools etc. definitely improve the quality of the outcome. But there is no way of making sure that every seam will match and every line will be completely straight. Where does that leave us poor quilters? Two things are important:
1. Respect the fabric
2. Do not expect perfection.


Some time ago, I had seen a quilt pattern/block at Love Laugh Quilt and I immediately bought striped fabric. Time passed and other quilts and baby blankets had to be made. The striped fabric sat patiently. Then, I saw some more striped fabric on sale at Connecting Threads and wasted no time in adding to my stash. Inspiration struck last night - Stripes!!! Yikes!!!

So, I pulled out the striped fabrics and noticed something.

In the fabric on the left, the stripes are not quite straight and parallel - they curve ever so slightly and waver. If the pattern you are looking to make requires (rather) precise piecing of blocks, this fabric won't work. It is cute and the bright colors might work well for something else. Oh well!
In this picture on the right, you can see that the lines on the fabric match the lines on the ruler - this is just beautiful. And this fabric, although the colors are not as bright as the first one will be my choice for making (trying to make) the near-perfect blocks with well-matched seams.

Why are these striped fabrics different? The analytical mind in me would not rest. And then I had my Aha moment - in the first fabric the stripes run selvage to selvage (bad idea) and in the second fabric they run along the length of the fabric!!! Yippee. I had actually figured something out!!!

When precision is important, make sure the stripes run along the length of the fabric. When buying fabric online, make sure that the stripes on screen look vertical (they will appear horizontal if they run from selvage to selvage). And when you are cutting the striped fabric, you will be better off to cut along the length of the fabric to maintain integrity. This is what I mean by "Respecting the Fabric"

I tell you, there are pitfalls of being self-taught, but then I do like my AHA moments!!! And speaking of AHA moments, spring came to my backyard, even if it is Fabric Spring!!!


Ideas are going to spring from my brain on to the cutting mat and the sewing machine - the fabric colors are the seeds of inspiration...

And here is one inspiration to begin the Spring Season!!!


Wednesday, March 5, 2014

Quilt Layout - Half Log Cabin

Every now and then (often), I will see a block or a quilt and think - ooh that would be nice. How can I make that? Can I use jelly rolls? How big a quilt would that make and how much fabric would that require?
Well, to answer all those questions and more, I open a blank excel page and start filling the boxes with color. And then...

Let me stop rambling and just show you the picture and you will get it.

 
Here are the step-wise instructions.


I am going to make this using jelly roll strips, so all widths are 2.5" and the lengths are shown above.  I divided the blocks into sub-blocks (A through H) to ease the construction process. For example - B and C sub-blocks are varying lengths of white strip + dark blue strip. So, it makes more sense to stitch first and cut later.

Construction of Blue Block
A - Stitch together a white strip with a light blue strip and cut into 2.5" sections.
B & C - Stitch together a white strip with a dark blue strip and cut into 4.5" section (B) and 6.5" section (C)
D - White strip 8.5" long.

Construction of Yellow-Green Block
E & F - Stitch together a white strip with a yellow strip and cut into 2.5" section (E) and 4.5" section (F).
G - Stitch together a white strip with a green strip and cut into 6.5" sections.
H - Green strip 8.5" long.

You will need one jelly roll of white and one jelly roll of color (trust me I have done the math). Use any colors you like. There are a total of 80 blocks (40 blue, 40 yellow-green) arranged 8 by 10. The finished quilt includes 5" borders and measures 74 by 90 inches, so a twin size.

If you like it, please leave a comment. And if you can think of ways to improve this, please please please leave a comment and tell me how.