Mari was feeling overwhelmed.
I was only too happy to lend a helping hand. After all, this tutorial is for Hands to Help :-)
If you have a layer cake in your stash, that hasn't found a perfect quilt, this is for you. Usually Layer Cakes have 20 fabrics, two squares of each fabric for a total of 40 squares. Of course you don't need a layer cake to make this block.
This tutorial is in two parts. In Part 1, we will make the four identical units. In Part 2, we will look at ways to make blocks from those units.
PART 1 - Making the units
Focus fabric
One square 9.5"
One rectangle 5" by 10"
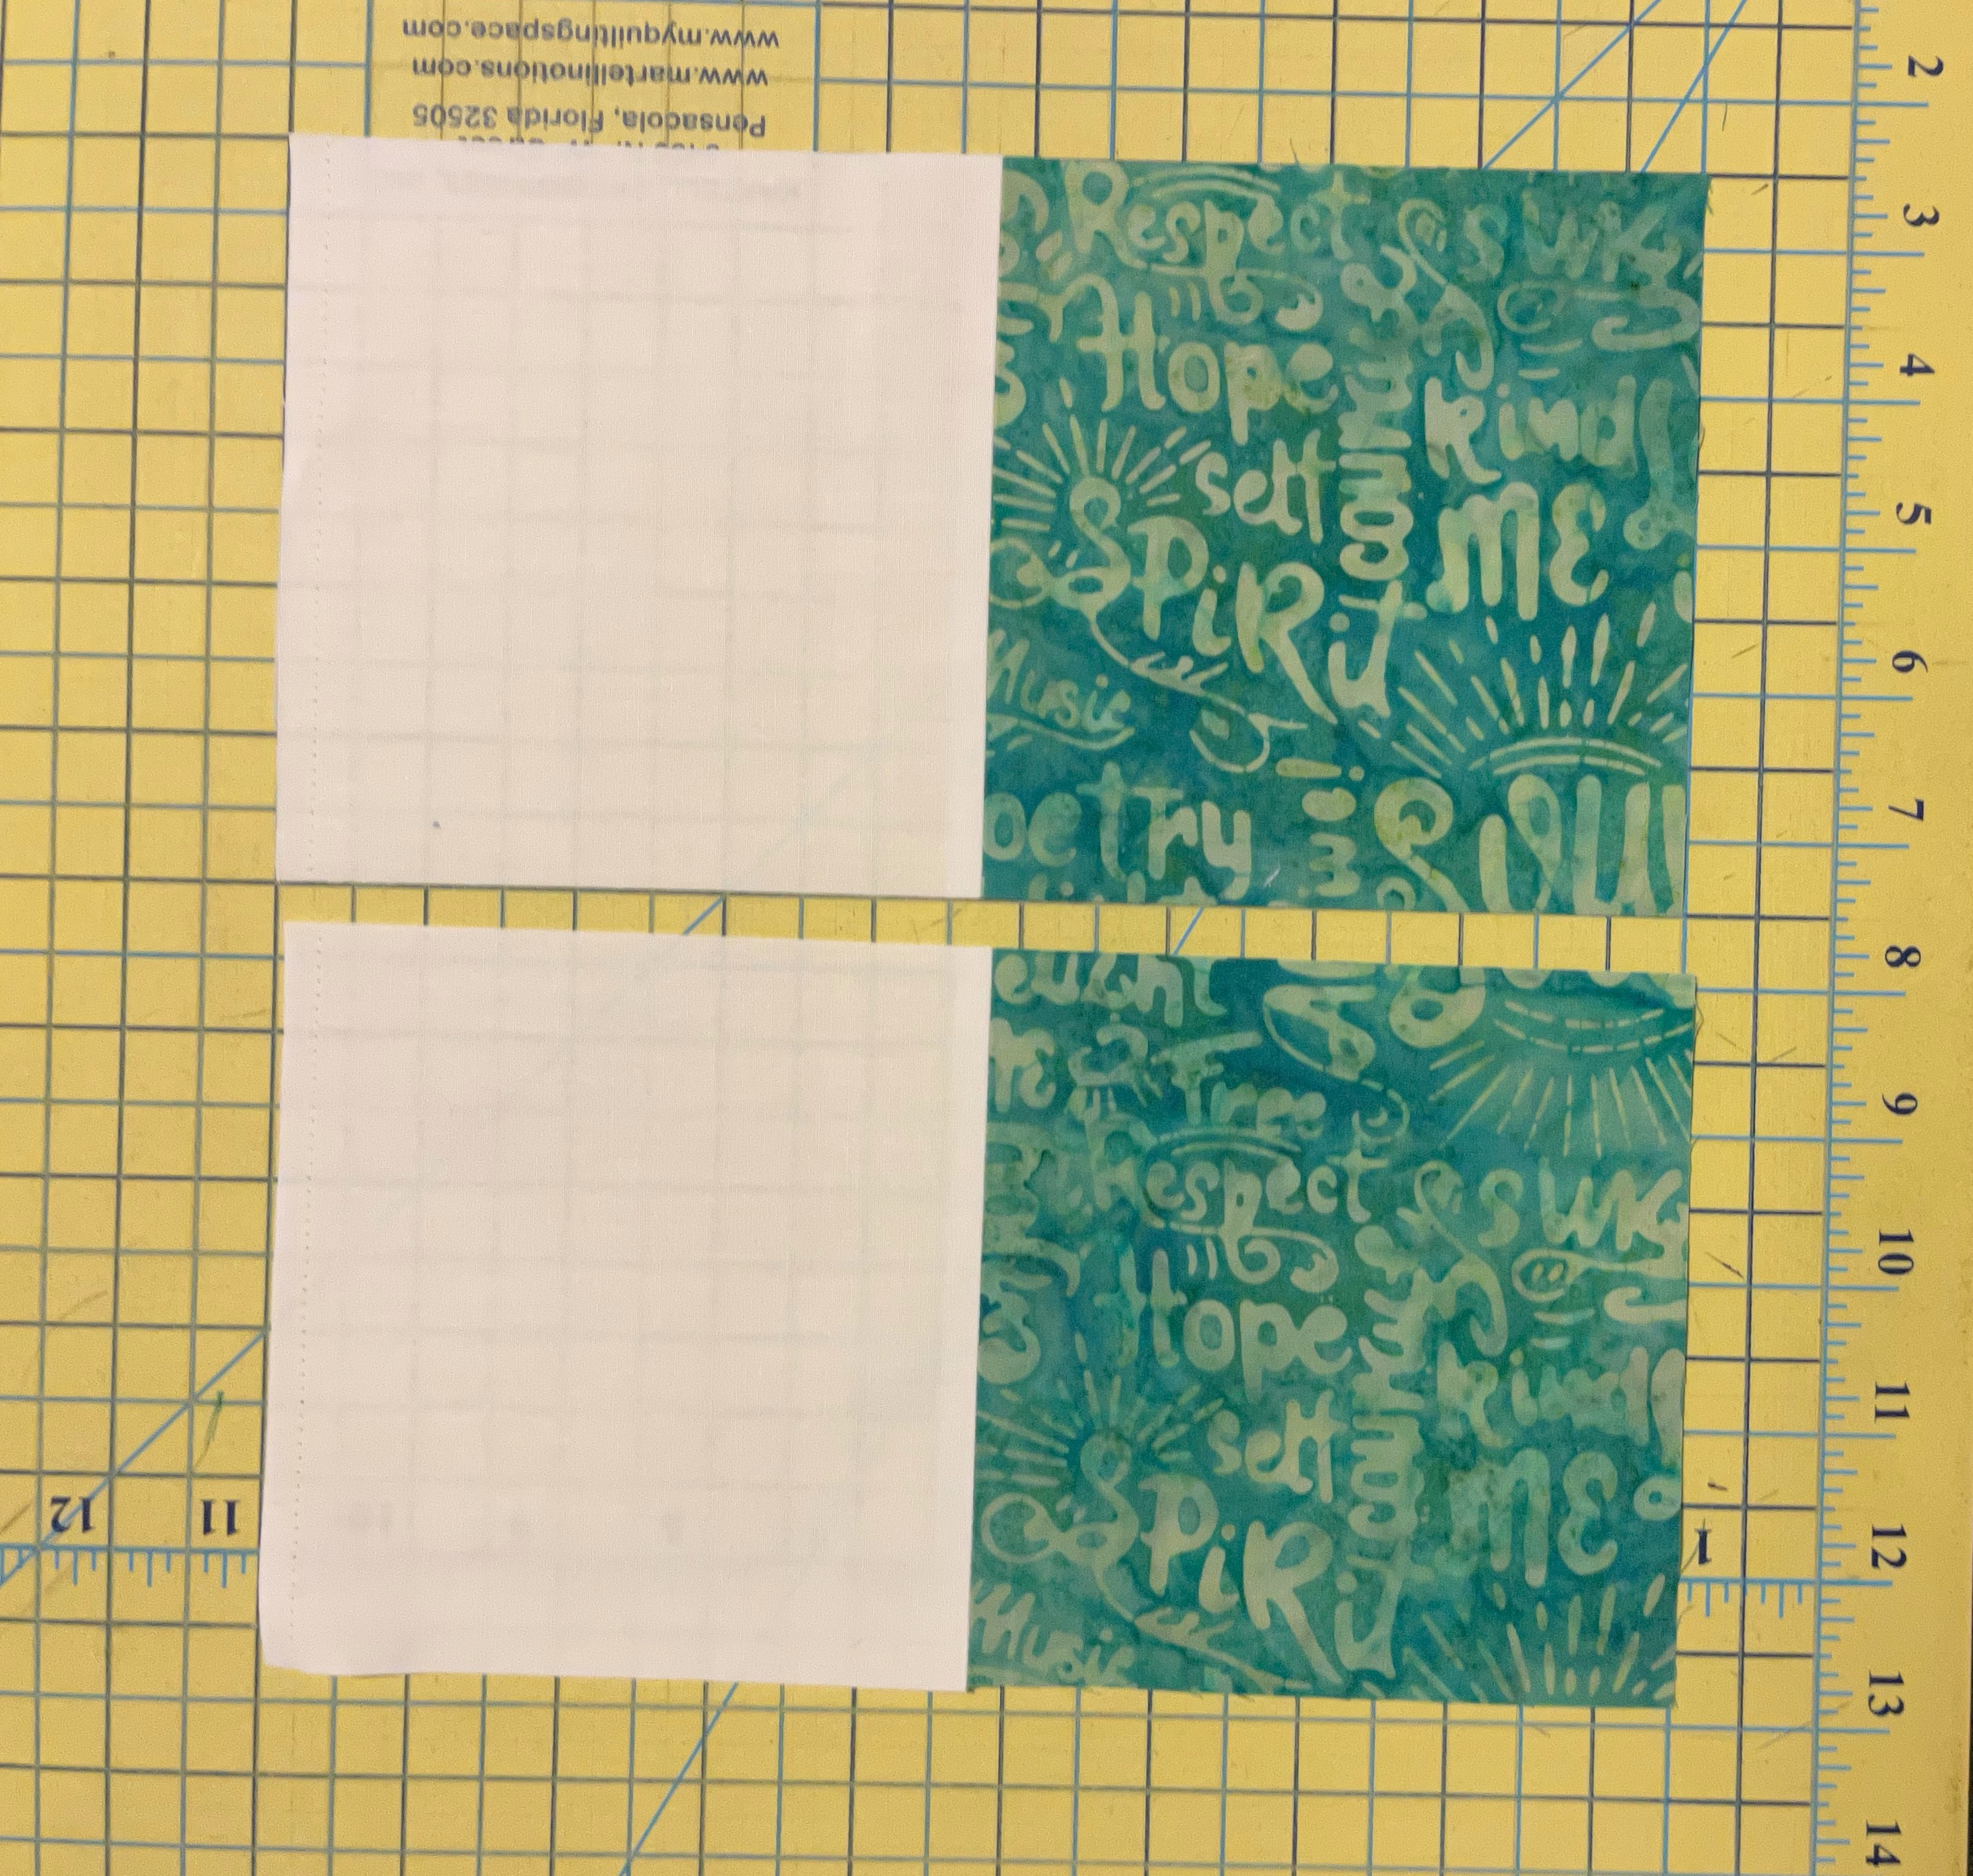
(Or you could use two identical squares from a layer cake, as shown in the pictures below.)
Background
One rectangle 5" by 10"
 |
| 10" square of focus fabric (if using a layer cake square) |
1. Cut the 10" square of focus fabric (if using a layer cake) into half for two rectangles 5" by 10". Set one aside.
 |
| Cut into half, two rectangles 5" by 10" |
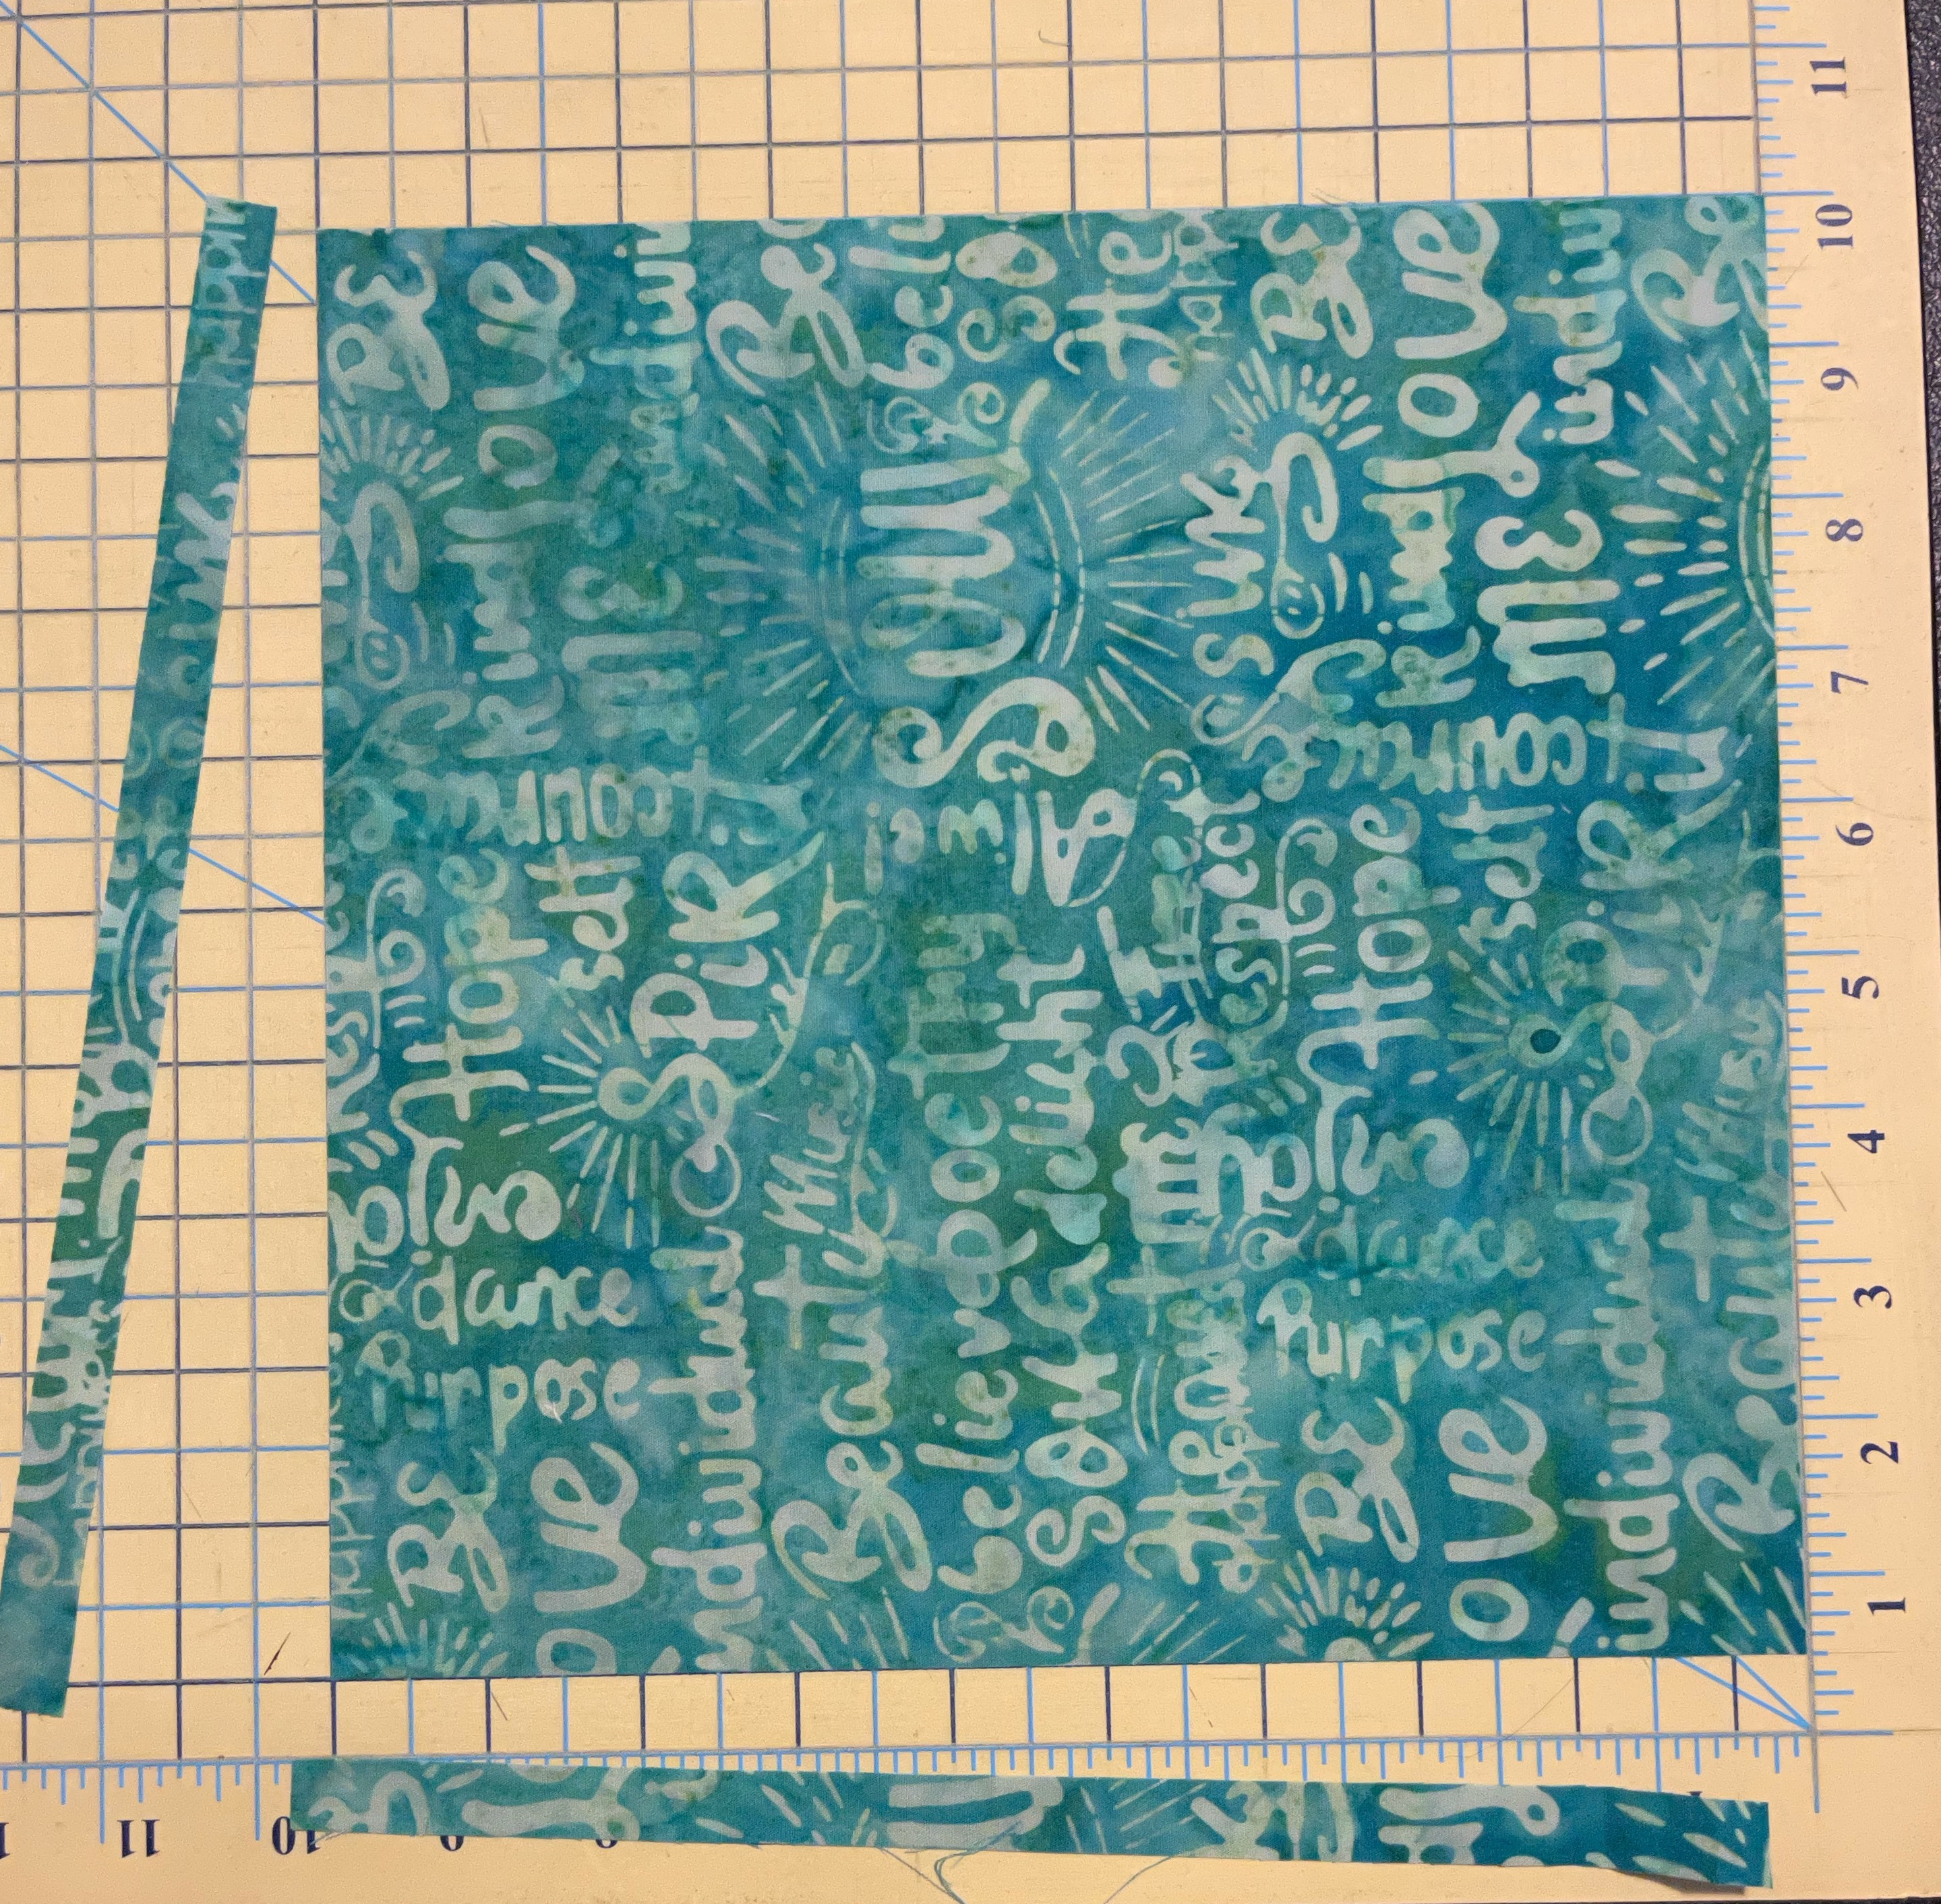
- Trim the two sides first, making sure that you trim exactly half inch inside from the edge of the 7" square.
 |
| Trim sides first |
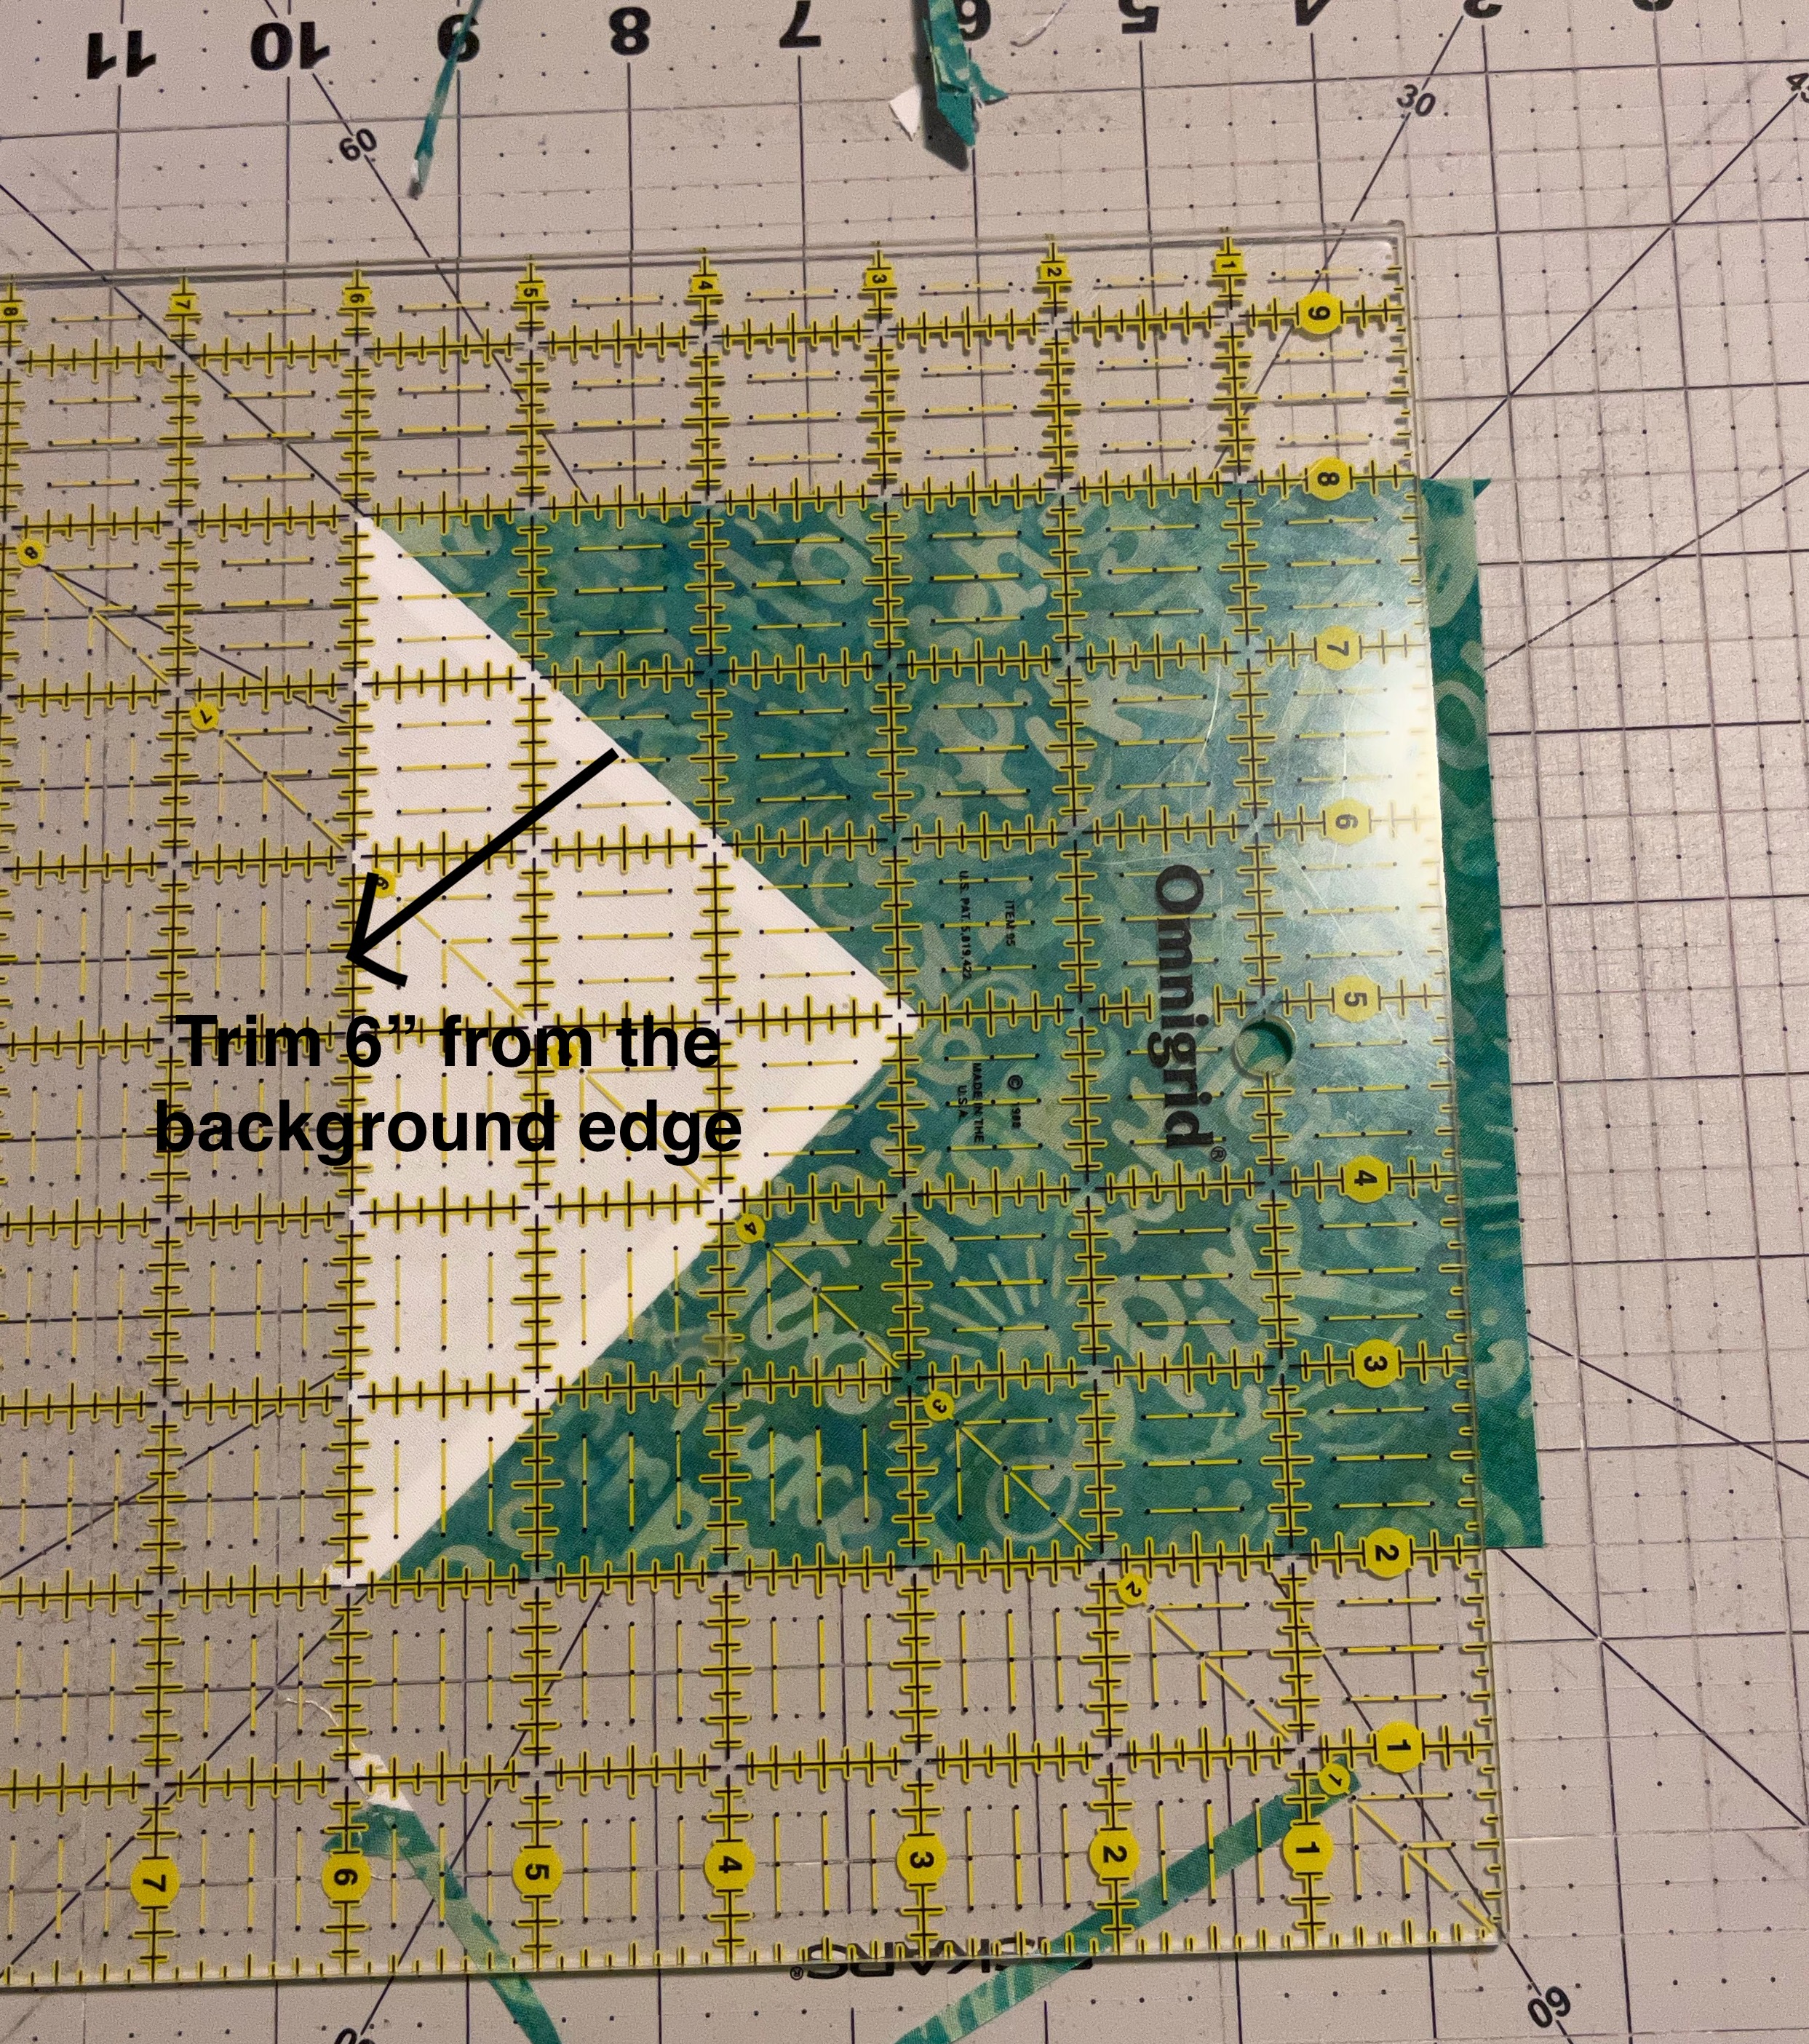
- Then trim exactly 6" from the background edge of the unit. See picture below.
 |
| Trim 6" away from the background edge |
- Do not trim the edge with the background fabric. This is very important, if you wish to maintain your points.
Similarly trim all four units.
PART 2 - Assembling the units
There are two basic ways to assemble these four units. We could arrange them in a 4-patch or in a 9-patch. See options below.
4-patch options (11" finished block)
 |
| Pinwheel |
 |
Swirl
|
In my opinion, this Swirl Block looks dense in the center. If you agree, you can snowball the inside corners, as shown in the following two pictures.
 |
| Swirl with Snowballed Inside Corners |
 |
| Swirl with Bowtie Center |
Other options with four units continue.
 |
| Diamonds |
 |
| Peaks and Valleys |
Arrange them as shown and sew like a 4-patch. Square to 11.5".
9-patch option (16.5" finished block)
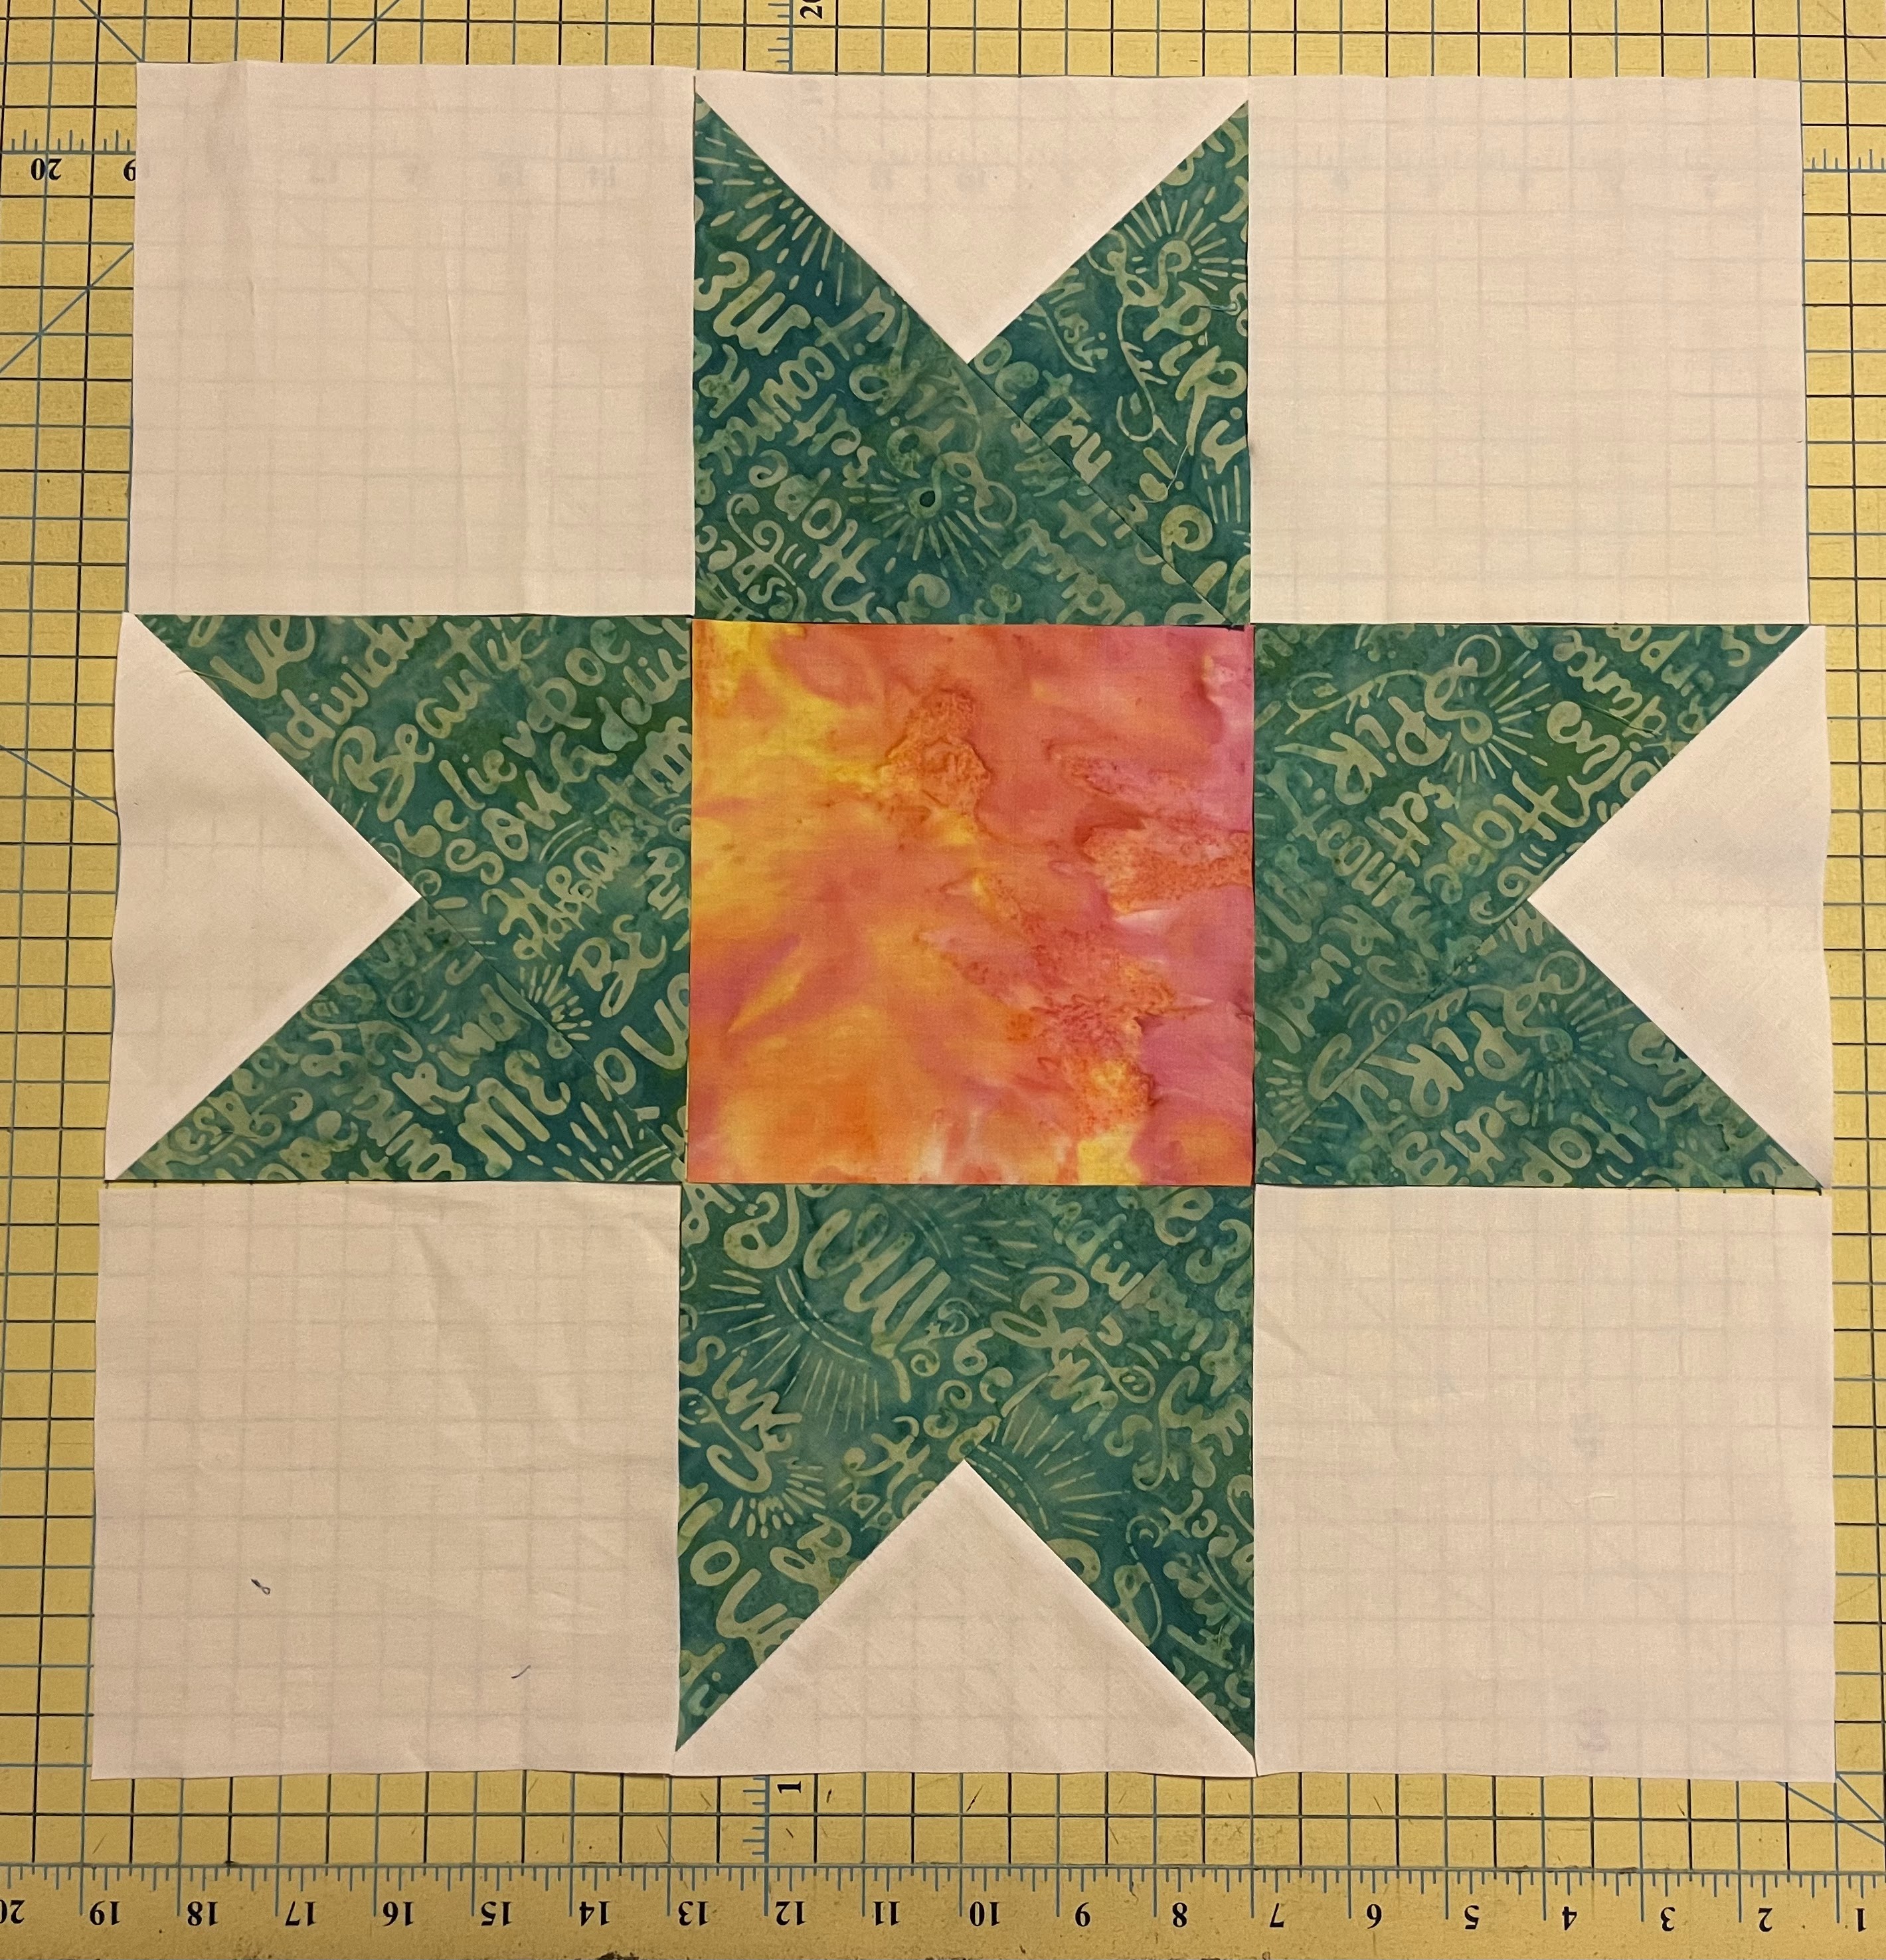
Using the four units and four background squares (6") plus one square of contrasting fabric (6"), arrange as shown.
 |
| Star Block |
Pin at the seams and sew like a 9-patch block.
 |
| Pinned |
 |
| Square at 17" |
 |
| Points safely away from the edge |
If you followed the cutting instructions, you will notice that the star points are more than a 1/4" away from the edge, ensuring that they will not be cut off even when you sew a full 1/4" seam.
This is my favorite block to make from this method. Do you have a favorite?
Please note that since the blocks are on a bias, there will be some wonkiness. It is okay to be imperfect.
- Nine blocks (arranged 3 by 3) will make a baby quilt.
- 20 blocks (4 by 5) will make a Lap/Throw/Mercyful Quilt.
Questions? Ask away and I will answer here so that all can see.