Wednesday, May 4, 2016

Strawberry Salad with PeptoBismol Dressing

One day in March, Paul came home to a very pink design wall.


Strawberry Salad + PiptoBismol Dressing


Paul: Is that a quilt for breast cancer awareness?
Me: More like Pink Eye.  I don’t know where to look.
It has no focus and no place for the eyes to rest. 

Scrap Bag - Good, Bad & Ugly
Let's start at the very beginning. Shall we?
One fine day as I was browsing the World Wide Web, I came upon Hawthorne Threads and noticed their Scrap Bags in the sale section. 

Strips Grouped
Ignorance & Temptation is an ugly combination. Next thing, I ordered a few of the Fresh Scrap Bags. When they arrived, they were just that – a mixed bag. Some were very pretty fabrics, some very ugly fabrics and some just in between – but all pink.

The first block

I figured, if I cut them up and put them together, they may come to something.
When I had made the Paulitiks quilt, I felt it was just too blue. May be if I made that pattern scrappy and pink.

There was only one way to find out. I cut up most of the pink scrap bag into 2” strips and started playing.

Hot Mess

Made a few blocks. Made a few more blocks and realized that it was too pink. May be I should add a little teal/turquoise/aqua.
A touch of teal

After I had made a dozen blocks, I realized that it was too pink, too scrappy, too disgusting and had absolutely no focus. I was devastated. But I was also determined to finish it. The uglier the project the more likely it will end up as a UFO. I could not let that happen because 2016 is my year of destroying UFOs.

Some red

So I marched along like a soldier on a mission. When it was finished, I HATED it. Wish I had used some neutrals in each block to balance the pink.

Does white help?

As I was arranging the strips, I tried to place the low volume fabric between the two high volume ones. This worked fine for each block but when I placed the blocks together, the high volume fabrics ended up adjacent to each other, making it look very busy. 


Low Volume between High Volume Strips


Further, the low volume middle strip, distanced the center square from the outer strip making the whole block disjointed.


I had a finished flimsy and no desire to quilt it.  Fortunately Mauna stopped by.
Mauna: What are you working on?
Me: It is a strawberry salad with Pepto-bismol dressing.  It is grossly pink. Not pretty and pink. Not Blush & Bashful. Just in your face sickly pink.  And I showed her the finished flimsy.

Chic?

Mauna: I don’t think so.  Imagine a little girl’s room that is painted very light yellow and is completely plain and then on the wall there is this quilt.  It is shabby chic and modern. It is something you might see in one of these modern lifestyle stores.
Me: Really?

Mauna: Trust me, this will make some little girl so very happy.
Backing Fabric
Whatever Mauna said made ME very happy and this strawberry salad of a quilt began to grow on me.  I picked a backing and a matching binding.


Teal/Turquoise Binding

Not everyone has to like it as long as someone likes it.  In the next few pictures, you can see how I put the ends of my binding together. No rulers required.


Binding Ends - 2.5" overlap - RST
Has it ever happened to you that when you get to the end of the binding and trying to connect the two ends, you get it twisted?  I did for about 18 out of 40 quilts.  Now, I have this method down - Perfect.

1. Make sure that the ends overlap by 2.5 inches
2. Bring them together and place them right sides together, (see picture above)
3. Now turn the one on the right (near my thumb) by 90 degrees towards the edge of the quilt, while keeping them RST (see picture below)


Give a 90 degree turn to one, keeping them RST
4. Now, mark the one on the top, as shown in the picture below.  
5. Pin in place and stitch. 

You have just connected the binding ends, without ruler, templates or a twist. Do a little happy dance.

Mark and Pin

Mauna's positive feedback encouraged me to finish this quilt.

Binding in process

Blame it on the early onset of spring or March Madness. Strawberry Salad + Pepto-Bismol Dressing is here to stay.
Completed!!!
 It is kinda pretty in a messy way, I think.

Labelled
 Finally, the clouds broke for just long enough that I could take a few pictures.

Backing rocks the Binding :-)
Isn't that grass just the perfect backdrop?

Thank you Mauna!!!

What do you think? Messy or Chic?
Did someone else's opinion make you see something in a completely different perspective?   I'd love to hear from you.  I will be connecting with my favorite linky parties.


----------------------------------------------------------------------------------------------------------
Oh, I just saw this pop up in my inbox and I am sharing with you.   There is a Flash Sale on these Quilting Classes at Craftsy.  Save 50% or more on the following classes.


Oh, you are not interested in these classes.  Never mind.
This link will take you to all classes that are under $20.  

This blogpost contains affiliate links.

Thursday, April 21, 2016

Basket Case or a Nut Bag

That is right.  I am a basket case right now. Or you could call me a nut bag.

There is no dearth of inspiration (or temptation, depending on your perspective) in blogland.   Seeing so many 1-hour baskets, I dived in too.

One-hour basket

It took me 2+ hours to make mine.
I am sure that after I have made a dozen, and I remember the pattern by heart, and all the fabric/interfacing is cut to the correct size, and I don't make any mistakes, and I don't get distracted...I will be able to make such a basket in one hour.

Basket #1
You get the picture.

According to the tutorial, the outer fabric should be home decor.  Missed that detail.
Silly me. Proceeded with quilting cotton.  And the basket ended up being a bit on the flimsy side.

Decided to put SF101 on the handles to give them a little more body.  Definitely like the outcome.

Pros
1. The instructions are very well-written
2. Different seams for the exterior and the lining - Brilliant!!!

Cons
1. The handles need interfacing. Not mentioned.

The other thing that is a personal preference - I did not like the seam in the lining.  Ideally, I wanted it to be smooth.

Attempt # 2
Looked for another tutorial.  This one was from ayumills.blogspot.com.

Smaller basket.  I made the exterior panel using 2.5" squares and linen for the main basket body.   Used SF101 to stiffen it first.

2.5" squares, linen
I used decor bond interfacing on the handles.  See picture below.

Decor Bond Interfacing on the handles

Ready to quilt


Then I quilted the exterior panel with batting. I went ahead and also used interfacing (decor bond) on the lining.  

Since I wanted a smooth inside, I chose to do a drop-in lining (contrary to the instructions in the tutorial).  It did not come out well.
The two - exterior and lining - did not quite match, causing the exterior to be puckered :-(
Once finished, I showed it to a dear friend, Nancy.  Bless her heart. She did not see the imperfections and took it off my hands.

Tried again.
Attempt# 3 -  Smaller basket.  Much better but still not perfect.
The finished basket is 6.5" by 4.5" at the base, and it is almost 5" high. Actually, I am pretty pleased with this one.


The exterior panel was first interfaced with SF101. Then quilted with batting.  The lining was interfaced with decor bond (maybe try SF101 next time).  Since the lining was dropped in, the insides are smooth :-)

Smooth Insides
Since the lining has decor bond interfacing, there is added bulk along the top.  It is top-stitched but that could be neater.


Attempt # 4 - Making the initial 1-hour baskets

I decided to use my just acquired knowledge to try my hand at the 1-hour basket again. I used quilting weight cotton (gorgeous blue/purple batik) but this time I interfaced it first with SF101.  Then used Thermolam as a second layer of interfacing.
Like before, I did not use any interfacing on the lining, because I wanted to avoid the bulk in the top stitching.  Used interfacing on the handles.


But my lining still had a seam and it was just a tad bigger than it needed to be, making it look wrinkly and crumpled on the inside.

Attempt #5 - Repeat Attempt #4.
The only thing I did differently this time was measure the lining and the exterior just before stitching them together. the lining was tad larger than required.  So, I increased the seam by 1/8". Remeasured. Much better.

Attempt #4 on the left, Attempt #5 on the right

Do you see the difference? The lining on the right one fits just a tad better.
These baskets are 9.5" by 5.5" at the base. The height is almost 6.5" They are pretty and I am sure they will make someone happy enough that they would pay for them :-)
Just wish that they did not have that seam in the lining.

By now, I have made five baskets using two different tutorials and I am still not completely satisfied.

So, I tried once again. Attempt # 6.
This time, I referred to no pattern. Made a much smaller basket.  It measures 4" by 6" at the base and it is almost 4.5" high.  Since it was small, I reasoned that Thermolam would be enough.  Interfaced the handles.
This time, when I made the lining, I did not leave an opening in it.  Once the lining was made, I matched it with the exterior of the basket.  It was a little bigger. I chose to sew again, increasing the seam by 1/8" to make it fit better.


After the handles were basted, I put the exterior inside the interior, RST.  Stitched all around at the top but left a 2" gap. Turned it inside out, and sewed the opening shut using top stitching.  Now, the interior was smooth :-)  Makes me very happy.

Smooth on the inside :-)

How smooth? I turned it inside out and it could be (almost) reversible basket :-)


However, I realized that I should have used SF101 on the exterior, followed by Thermolam.
Should have used SF101 on the lining. I am sure there is an Attempt #7.

Medium and Small (ignore the screwdriver, please)


Paul: More baskets. Pretty!!!
Me: Yeah, but I am still not there yet.
Paul: Where?
Me: Where I have all the features I want and it is neat.
Paul: Try a different pattern
Me: I did
Paul: Is it a free pattern or did you buy it?
Me: (I knew where he was going with it. I got irritated.)
You know there was this one time I bought a pattern for making zippered pouches.  It included fabric as well. In a kit.
Paul: The kit and caboodle?
Me: NO. There was a kit but the caboodle was missing.
Paul: How so?
Me: So, the pattern says - use interfacing. But they do not tell you which one.  You have no idea how many different kinds of interfacing they have out there.
And I have made bags with no interfacing and with wrong interfacing.  I am ashamed to show them to even myself.
Paul: So a free pattern may or may not work. Buying a pattern may not have everything.  What is the solution?
Me: Trial and Error. That is WHAT I AM DOING!!!
Paul: Could you take a class or learn from a live person?


Once again, Paul had a made a valid point.  However, by now I could (almost) teach a class on the dos and don'ts of fabric basket making.

Three sizes - Nested Baskets

What if the tutorials and pattern still leave something to be desired. Yes, you could do what I have been doing - Trial and Error.

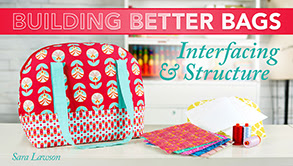
Did you know there are classes (yes several) on making bags, and pouches, and organizers on Craftsy? Best news - they are on sale!!!
Wish I had known this sooner. Silly me. Check them out.


And if you are into making fabric baskets and organizers, you must check out these two classes.


Some of these classes are on sale now which makes me feel like this!!!

Goofiness!!!


Paul: What if you don't like the class? 
Me: Well, Craftsy will refund your money.


In the mean time, I am making more pouches for the quilt show.

A Bag a Day!!!

Cuteness Overload!!!

Light Aqua inside

Green Swirly Lining

Dotty - Inside and Out :-)

Pretty in Pink!!!
I feel very guilty right now.  I am addicted to making baskets and pouches while several quilt tops languish away waiting to be quilted.  I am Sew Preeti - No Quilts!!!

Now, that I have confessed, it is time to put away these little evil distractions and finish a few quilts this weekend. What do you think?
As always, I'd love to hear from you.


This blogpost contains affiliate links.