Showing posts with label Scrappy. Show all posts

Wednesday, August 6, 2025

Hot Stuff - Oliso Iron Case Challenge

Picture this - a completely solar-powered, aerodynamically designed, sleek automobile of the future. Its exterior is so dark and shiny that the passing landscape is reflected perfectly on its surface.


Cool Trees, Scorching Planet


In January, we received a mini Oliso Iron, complete with a matching Solemate (a base for placing the hot iron) and a thick wool carry case. Island Batik's August Challenge is to decorate the carry case for our Oliso Mini Irons.


This was an unusual project. The thick wool carry case would certainly break a needle or two, if I tried sewing on it. The idea of hand-sewing on a thick material made my finger pads shudder, thimble or not. Design consideration aside, the logistics of this project was the bigger challenge.


I decided that it would be best to stick to the surface, instead of sewing on it.  I traced the shape of the two sides and the back on to a background fabric, cut it out and began designing/playing.


Bright Fabrics + Steam A Seam 2

Layering


Wool Mat - Notation for the next Layer

I used a heat-erasable pen to mark the gentle slopes of the landscape and note its placement on the existing layer.


Once I layered the landscape curves on the background, it was time to add the trees, followed by quilting with wavy lines. I stitched the entire piece onto the smooth side of SF-101 and trimmed it. I secured the edges with zig-zag stitching and ironed the piece on to the carry bag, so that the sticky/bumpy side of the SF-101 did the work!

Ta-Da


This was a fun and creative project, which forced me to think outside the case :-D  I used the case once in the beginning to trace the shape and once in the end to stick the piece to it. I am glad that I did not have to stick a needle through that thickness. My finger pads are thanking me :-)

But enough about that. Let's see how the other three surfaces turned out.

Preparing the Landscape hills


Adding Trees


Cool Landscape - Bright Trees


The Cute Caboose


Braids

The top was a simple rectangle shape. I treated this slightly differently. I used the leftover braid from a previous project, stitched it on all four sides facing the sticky side of SF-101, cut a slit in the SF-101 and turned it inside out. I carefully pushed out the corners and stitched on top. Then I ironed it to the top of the carrying case.

I could not use this technique on the side panels because they were thicker due to the use of stabilizer (applique) and could not be turned. 

In the end, I am so very pleased with this project. It challenged me, allowed plenty of room for creativity and turned out to be very cute :-) That is a win-win-win.

Do check out other Island Batik Ambassadors' posts. All of our projects are so uniquely creative. I love it!

Many thanks to Island Batik and Oliso for providing products for this project thru the Island Batik Ambassador program.

____________________________________________________________________

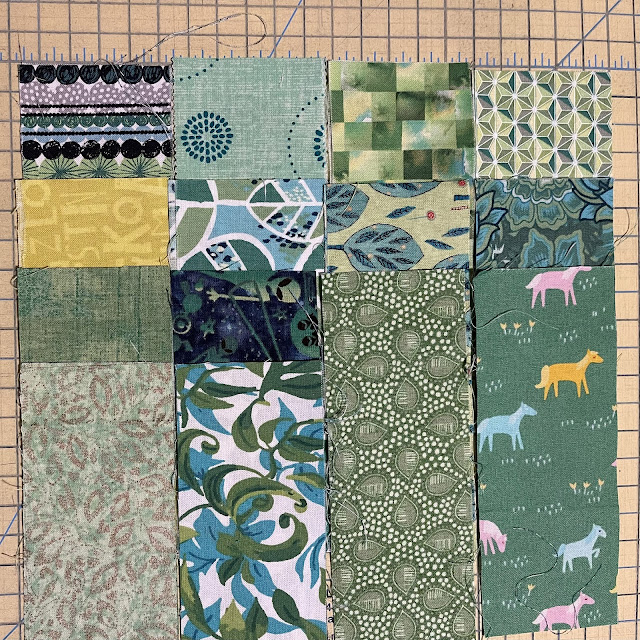
In other news, Angela announced that Aqua/Tea/Turquoise is the Rainbow Scrap Challenge color for August. Here are my picks.


Island Batik Scraps

I will be sharing with all my favorite linky parties (including Angela's on Saturday). See full list on the sidebar. But I'd love to hear from you. How are you feeling - Hot or Not?


Wednesday, March 12, 2025

Dreaming of Daylilies - Ambassador's Choice

March is Ambassador's Choice. 

March brings a free month for you to determine your own project of any size, using any theme and any technique!! This is an opportunity for you to express your creativity without guidelines. Have fun!

Here is my response.

Dreaming of Daylilies


Designed in EQ8, and made with Poetic Bouquet collection, it is a combination of Irish Chain blocks and appliqued Daisy blocks.


This is a lovely collection with beautiful gradations in purples and aquas.  I wanted to show off these value gradations in the design.

EQ8 Mock-up


Value Gradations


The petals are lightest in the center getting darker towards the tips. This design gives an illusion of a circle in the flower that echoes the circle in the center.


Aqua Daisy, Purple Center


Bloom


Blossom


Shimmer


Shine


I used Egg White and Glaze for the background. The batting is Thermore by Hobbs. The Binding is Rice.

I used Schmetz Microtex 80/12 needles for both piecing and quilting.  Dreaming of Daylilies finished at 52" square.


Thank you, Paul!

Paul holds more than just quilts. He also holds my heart and his support is the world to me. 

Here are a few more pictures, close-ups included.


Who says you cannot mix backgrounds?


Glaze and Egg White


She drapes in beauty!


Dreaming of Daylilies was published in Annie's "For Love of Precuts".


But wait there is more. 

The leftover pieced strips (from making the petals) were used to make this baby quilt, I named Lilyput :-)

Lilyput, 40" square


Pieced strips were inserted between solid white background rectangles to make 10" finished blocks. Lilyput finished at 40" square. The binding is Aqua (Island Batik Blender).

Here are a few more pictures:

Solid White Background


Turquoise Binding


Go soothe a baby!


In other news, I have completed the Rainbow Scrap Challenge Blocks for March. 

Yellow for March RSC


Island Batik Scraps


I will be sharing with all my favorite linky parties, including Angela's and Yvonne's Favorite Finish for March. See full list on the sidebar. Wishing you warmth and a measure of calm in these troubled times.

Wednesday, October 23, 2024

Pesto Mushrooms

I have a new finish and I am so excited to show it to you!

Meet Pesto Mushrooms :-)

Pesto Mushrooms


When I was asked to make a Birthday Quilt for a 6-year old boy who loves the color Green and is fascinated with Mushrooms, I said Yes, please :-D

The Pesto (Green Fabrics) was the easy part.  I wasn't sure how to incorporate mushrooms.

Pieced or Appliqued? Small or Large? A mix of large portabellas and tiny enokis?

I turned to EQ8 and found a template for mushroom applique.  BINGO!!!! In EQ8, the dots are applique as well. I think I can do with using dotted fabric instead of adding each dot. Insert eye roll here.


EQ8 Mock-up


I had fun raiding my box of green scraps and I found plenty of 2.5" strips in various lengths. 

Variety of Greens!!!


Chocolate Dots Added


Making the base blocks was a simple process. Making the mushrooms was a fun albeit a multi-step process.

I transferred the three shapes - the mushroom cap, the gills, and the stem on to a thin cardboard from a box of cereal. I cut out the three shapes and traced them on to the Steam-A-Seam 2 sheets. Repeat 24 times :-) It took six sheets.

I then rough cut all 75 shapes out of the Steam-A-Seam 2. 

Then I chose fun fabrics. Bright dots for the caps, light yellow/beige for the gills and brown for the stems. The next step required peeling the 75 paper slivers and sticking the sticky side (of Steam-A-Seam 2) to the wrong side of the fabrics.

Now I had to carefully cut the exact shapes, ensuring the slight curve of the mushroom caps and the gentle line of the gills. This took a while. Oh but it was so worth it.


The first Mushroom

The second one!


One 5" square

Two Mushroom Caps (very carefully cut)


Was I ready to add the mushrooms to my blocks? Not yet. 

I arranged the base blocks on my design wall in the desired layout, making sure that no two white squares were touching.

I did not add the mushrooms to the individual blocks until after the layout was finalized. I wanted to make sure that all mushrooms were upright, whereas the blocks could be oriented in any way.

Once I was happy with the layout, I started adding the mushrooms, one column at a time.


Adding Shrooms

I added one mushroom at a time, peeling away the paper, ironing and stitching in place and returning it to the design wall, before picking the next block.
 

Stitched in place

Step 1 - Make the Base Blocks. Set aside.

Step 2 - Make the Mushroom Parts (Cap, Gills and Stem). Set aside.

Step 3 - Finalize the Layout, separating the white squares.

Step 4 - Working with one block at a time, place and iron the Mushrooms. Gills first, followed by the stem and lastly the cap on top of both (I messed up the first one). Stitch in place.

Oops NO!!!

Step 5 - Stitch the mushroom blocks into a flimsy, making sure that the layout stays intact.

It is fun and looks simple but there are many steps and the order of the steps is important! Here is the completed quilt!

Such a happy quilt, 50" by 50"

Honestly, I think the whole quilt is a tad too busy, with so many greens, chocolate dots and all the bright mushroom caps. I could have used fewer greens, or a solid brown instead of dots. But for a six-year old, who needs a lot of stimulation, it will do just fine.

Pesto Mushrooms finished at 50" square. The backing is pieced from a directional mushroom fabric. I added narrow brown strips (when joining two pieces) to avoid the weird look of an ill-matched pieced print. All mushrooms are upright - even in the backing!


Pieced Backing

A yellow striped binding completes the look. 

Yellow Striped Binding

Let me show a few close-ups. These mushrooms are so stinking cute.

Labelled


Bright and Dotty


Thank you, Kaffe


Who says mushrooms grow in damp, dark places. Look at these beauties thrive in the bright sun :-)

My Happiness Mushrooms


Red and Pink


And one last look!

Such Fun Guys!


Once the quilt reaches its intended recipient, I will add another picture. I am hoping for big smiles. If Pesto Mushrooms made you smile, please let me know. 

Sharing with all my favorite linky parties. See full list on the sidebar.