As promised, here are the first two (of the total 14) quilts that I made for the Sugarland Fall Festival.
This was the Charm Box free tutorial from the Fat Quarter Shop and it is a great pattern for using charm squares.
I watched the tutorial and said - Huh, that is wasteful!!!
So, I made my own sketch - yes, it is very sketchy. The finished quilt would measure 36" by 41".
 |
| Sketchy Sketch |
I needed 24 charms for the main quilt and 30 charms for the borders. So I grabbed a few blue-green charms, a few 2.5" white strips and went to town.
For the sake of simplicity and speed (mostly speed), I followed these steps.
Step1. Choose two charm squares that go together well. Cut one charm in half and place the second in between and stitch along the two sides. Do this 12 times, using 24 charms.
 |
| Keeping the rows numbered |
Step 2. Add the vertical strips in between the charm blocks.
Step 3. Add the horizontal strips.
 |
| Horizontal Strips Added |
The vertical strips in between the blocks were 2" finished, so the use of jelly roll strips was perfect. But the horizontal strips and the outer vertical strips had to finish at 1.5". So, after I sewed the jelly roll strips, I carefully trimmed them down to size.
Step 4. Add the outer strips
Step 5. Add the borders - 6 charms on top and bottom, 9 each on the sides.
 |
| Completed!!! |
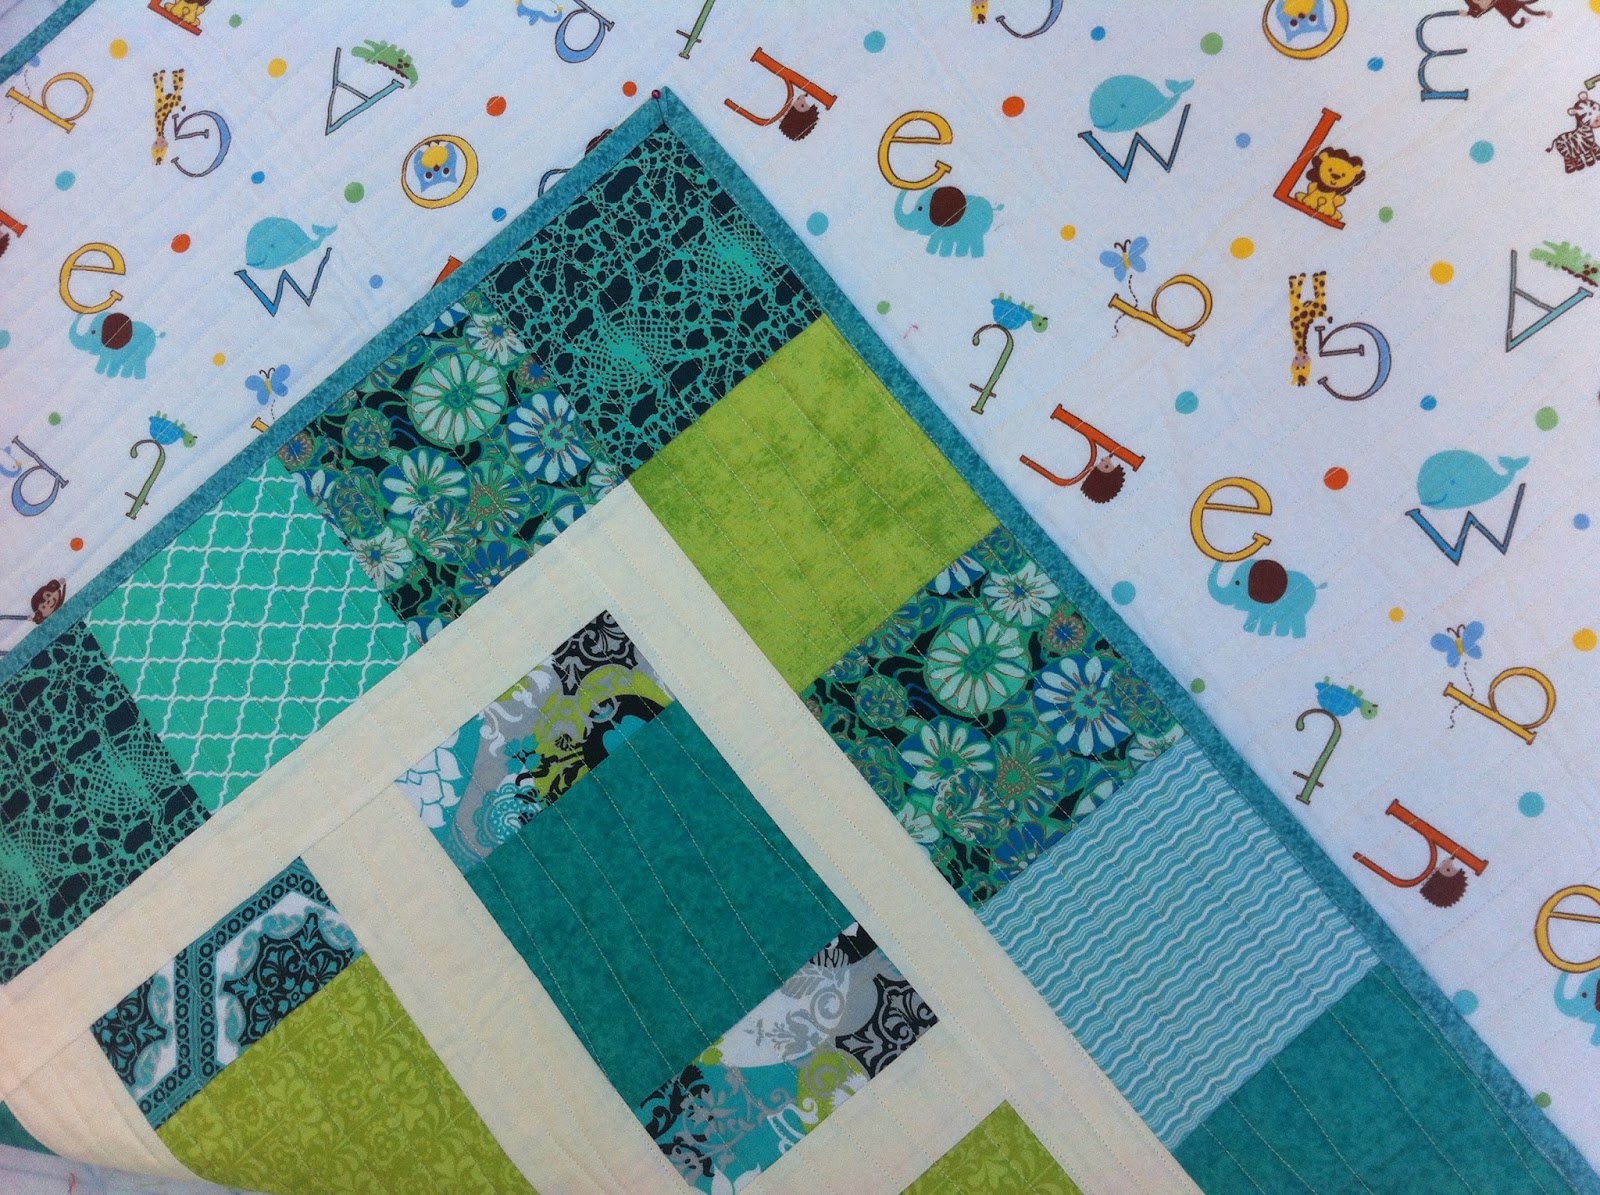
I chose my usual Warm & Natural batting and this cute alphabet/animal print for the backing.
 |
| Baby Friendly Backing |
Quilting had to be super simple too. I quilted using gentle curves, in one direction only.
The binding is a turquoise blue/green near solid that matches the front and the back perfectly.
 |
| Super Simple Speedy Quilting |
 |
| Labelled, yeah!!! |
 |
| Matched Binding!!! |
 |
| You make me happy |
 |
| Bluegrass |
Since this was a successful completion, I was pumped. Therefore, I decided to use my energies to make another quilt but this time in more girly colors.
Meet Candyland.
 |
| Bright & Happy |
It is extremely rare that I will like all the fabrics in a charm pack or a layer cake. Lili-Fied is an exception. I bought Lili-fied layer cake on Craftsy when it was on super sale and I fell in love with it.
For Candyland, I cut up the layer cake into charms and followed the same procedure as Bluegrass.
 |
| In love with Lili-fied |
 |
| Backing - Yummy! |
Not only the backing colors matched the Lili-fied line, they also decided the name of the quilt - Candyland.
 |
| Pink and Orange |
 |
| Labelled |
The quilting is simple curvy lines, one direction only. No turning and super speedy. Here are few more pictures, because there is no such thing as too much eye candy.
 |
| Hot Pink Binding |
 |
| Binding matches both sides!!! |
 |
| My sunshine... |
 |
| Candyland |
As I write this blogpost, Bluegrass is sold. But Candyland is yet to find a loving home. One day, I am sure, it will make a little girl drool, just like I am doing right now.
If you are reading, please write to me. I love to hear from you.


Preeti,, you make my heart SING!!!!!!!! Your dedication to finding the "better" ways to make up patterns is my favorite part of you!!! You've got binding down perfectly! Add that to your pefect piecing and clean quilting, it a win win!! I especially love your lables.. One of these day i'm gonna label my quilts...LOL
ReplyDeleteps... i saw that tutorial at FQS and thought... seems like they are more about featuring that "ruler"....:))))
I loved seeing this pattern in both boy and girl colors. They turned out super cute and I love that they are great colors but aren't only for a baby. These would also make good wallhangings.
ReplyDeleteYou've written this pattern in such easy language that even I can understand it. Teehee. I will definitely be borrowing this pattern for a future Project Linus quilt.
ReplyDeleteWe must get together again soon. I miss you , Preeti!
Sweet quilts!
ReplyDeleteYour quilts and your stories are so fun to look at and read - I get excited when I see your name in my inbox! YAY! Another from read from Preeti! Thank you for sharing.
ReplyDeleteThank you for sharing. Beautiful quilts. I have a few charm squares that will be meeting Mr. Rotary cutter soon.
ReplyDeleteI enjoy the simplicity of your design. I don't even need your tutorial. Just the number of charms needed down the sides and t and b. How simple but gorgeous. Thanks!
ReplyDeleteWhat I meant was don't need the complete tutorial printed out.
DeleteExcellent tutorial for these bright and beautiful quilts! I know I will be making a couple quilts for charity using your tutorial. Thank you for sharing and have a wonderful creative day!
ReplyDeleteI love how you changed/improved that pattern. I have a set of charms that need to be a quilt, and I've been waiting for inspiration. I think I found it.
ReplyDeleteSometimes you gotta change it up! Thank you for sharing your tutorial!!
ReplyDeleteTwo great looking quilts! Love the boy and the blue and green combo. Thanks for the tutorial too.
ReplyDeleteWhat cute little quilts and easy patterns too. They will be well loved. Gretchen
ReplyDeleteBeautiful quilts! love both the boy and the girl one- I wouldn't be able to pick which is my favorite as the colors are so wonderful!! Thanks for sharing!
ReplyDeleteWow, I love them! And no waste! Thanks for the tutorial!
ReplyDeletereally excellent! love the colors
ReplyDeleteWow - how productive of you to produce two quilts!! They are lovely - they really show off the beautiful fabrics.
ReplyDeleteLovely! I hate to waste fabric, too, but it looks like you solved that pretty easily!
ReplyDeleteThose are both so gorgeous! This looks like another Very Useful Pattern to remember for when I next need a handy baby quilt. *makes note* Thanks so much for sharing!
ReplyDeleteI am always looking for ways to use Charm Packs. Thanks for the inspiration and for linking up with TGIFF!
ReplyDeleteA dharming way to use charm squares Preeti! I really love the Candyland version -especially how well the backing looks with the front!
ReplyDeleteSo sorry - "charming" not "dharming"
DeleteBoth quilts are gorgeous! Sometimes simple is just the best way to go,
ReplyDeleteLovely little quilts. Thanks for sharing your sizing, etc. There may be a similar quilt in my life... well after I get through a million UFOs.
ReplyDeleteYour quilts are lovely. Great job!
ReplyDeleteGreat quilts! And wonderful instructions! I see a quilt like this in my future, thank you.
ReplyDeleteI also ordered this hexagon fabric from craftsy. Only I plan to make placemats and probably with the left over a couple of mug rugs. I do sew hexagons, but very slowly. I sew them when I' m watching TV or watching a movie on my laptop. So it takes awhile to make enough to make into something. It just is busy work.
ReplyDeleteI love what you have done with the hexi fabric, hope I can be as creative.
Just saw this. These are super cute. I think I will have to make at least one!!!
ReplyDelete