Showing posts with label Bright. Show all posts

Thursday, July 7, 2016

Side Effects of Marriage (and quilting)

We had a fight!!!

Scraps

He got angry ( I am sure I provoked the saint of a man.)
And said things that were hurtful.  ( I am sure I deserved it.)
And then he stormed out of the house. (What else could he do?)

Where is the broom?

Needless to say, I went to my sewing machine while tears streamed down my cheeks and sobs convulsed my body.

What a mess!

What shall I work on, I tried to think.

Design Wall to the Rescue

There are bags and baskets to make.  About three dozen of them are still unfinished.

Basketful of Pouches

I could quilt any one of the four quilt tops.  I believe they look at me with such neediness as the cat begging for a sliver of turkey lunchmeat.

Completed KISS flimsy (from Craftsy Blog Hop)


There are at least five new quilts that have to be made for specific recipients - my brother, my friend in India, my high school friend also in India, one of my teachers in India, one of my sister's friends, and her sister-in-law.

Blue Strips for a Future Quilt

No. No. No.
Look at yourself.  You are more pathetic than a pile of ugly scraps.
Sobbing and Crying - you will just ruin fabric and thread.

Some order from chaos

So, I did the only sane thing I could do.  I opened my bag of scraps and went to town.
Who cares if I ruin them, I thought, still sobbing.

I am liking this!!!

Being married, fighting with your spouse is inevitable, in my opinion.
As a quilter, it is inevitable that you will have scraps.

Three Columns of Blocks

So when one side effect threatened to ruin my day, I turned to another.

Finished Flimsy

So will I cook for Paul?
Sure, if he asks nicely, I will.  He still has not.
Guess that means I have more time to myself :-D

So bright and cheerful

Now, that is a good side effect (time for quilting) of a bad side effect (fighting).
Trust me to always see the bright side of things.
And speaking of bright side, this flimsy is not too shabby either.

Scraptastic

What do you think?  I am going got call this one Side Effects :-D

Now, that adds another flimsy to my to-be quilted list.  Shall I add this to my one monthly goal?
Why not?

Not sure it will get done.
Because, now that Paul and I have made up, I am feeling sane enough to dive into a new project.

Here is a sneak peek at the auditioned fabrics.

For Angel's quilt

I will be linking with Scraptastic Tuesday and One Monthly Goal, along with all my other favorite linky parties.

And please, please share your thoughts about fighting, coping and making-up too!!!

  -------------------------------------------------------------------------------------------------------------------
Oh, I almost forgot to tell you that Craftsy is having a 50% off sale on their top classes.


And while I was browsing, I could not but notice that this very yummy Free Spirit by Tula Pink fabric was a whopping 40% off.  No, that is not sale. That is a steal!!!

Free Spirit by Tula Pink

This blogpost contains affiliate links.


Sunday, February 14, 2016

KISS - Keeping it Simply Strippy

This post is modified from the original to remove dead links. The tutorial is unchanged.
Here are the steps to the tutorial.


1. Choose eight strips (6" by WOF) that you love. Arrange them (on your design wall) in a way that adjacent strips have some contrast. For example, you may not want to put yellow next to the white. Alternate light and dark strips.

Fabric Selection - 8 Strips


2. Sew the strips together, along the length, alternating sewing direction.  Stitch Strips (1 and 2), (3 and 4), (5 and 6), and (7 and 8), starting from the top.  Iron the seams to the dark side.

Piecing the Strips

3. Stitch strip sets (1+2) with (3+4), starting from the bottom.  Similarly sew (5+6) with (7+8) starting from the bottom.  Press seams to the dark side.


4. Finally, stitch (1+2+3+4) to (5+6+7+8), starting from the bottom. Press the closed seam in place.  Do not turn it to any side. We want to keep it folded in half, at this time.

Pieced Strips, Folded.

5. While keeping the strip set folded in half at the middle seam, using your rotary cutter, straighten the top and bottom edges. After trimming, you should have at least 42".

Straightened top edge

6. While still folded, cut across the sewn strips into seven sections of 6" each.  See picture below.


7. Now, you can press the central seam to the dark side. Place the cut section on the design wall. See picture.

First Cut Section

8. Place the next cut section, offsetting it about 3" from the end of the first section.  See picture below.  Place all the sections on the design wall, as shown in the picture.

Seven Cut Sections

9. Cut a 3" by WOF strip from black yardage. Cut this strip into seven 6" by 3" rectangles.


Solid Yardage, cut seven 6" by 3" rectangles

Place a 6" black strip at the right end of the top row.  Now keep adding the black strips, alternating the location with each row. The last row will have the black strip on the right.  See picture below.

Offset rows with black rectangles

9. Sew the black rectangle at the row ends, as placed. Sew the seven rows together, once again alternating the sewing direction.

Almost done

At this stage, I turned the quilt top by 90 degrees, to make it fit better on my design wall.

10. Add a 2.5" black border.
Top and Bottom Border added

Finished Flimsy!!!
The finished quilt top is 44" by 52.5".
Step back and enjoy your handiwork!!!

Backyard Picture 

The colors are so bright, they light up my sad backyard.

So pretty
It is a very simple, fast and easy to follow pattern.  And you can make it your own. Use large prints that you'd hate to cut up. Use animal or baby prints for a fun, cute quilt.  Trust me, you can put together this quilt top in one afternoon.

I am in love!!!

Sharing with Mari's Hands to Help Linky Party.  As usual, I'd love to hear your comments. 

Thursday, December 31, 2015

Terrace Garden and more...

Terrace Garden is the last quilt from the Sugarland Fall Festival Series.

Terrace Garden
As soon as I saw the Hello March pattern, I knew I had to make it.  It is layer cake and FQ friendly.

Terrace Garden is definitely "inspired" by Hello March.  I say inspired because in the frenzy of making 14 quilts in the 4-week period, instructions and directions may have been overlooked...AHEM!!!

The actual pattern looks a bit different than my version of it.  However, I am acknowledging the source/inspiration for Terrace Garden. Thank you Allison Harris (Cluck Cluck Sew).

I used the Lili-fied layer cake squares for making Terrace Garden.

Lili-fied Fabric

Just a gorgeous fabric line. Alas it is all gone now.
I used the pink and orange squares from Lili-fied in Candyland and just loved it.

The blocks are not square but rectangles, which gives the elongated look to the layout.  The original pattern is uniform, whereas my version is go-with-the-flow.  Or you can say fly-by-the-seat-of-my pants :-D

The batting my usual Warm & Natural.  For the backing I chose a very rich, dark and deep poinsettia fabric. The flowers are so densely packed that you can hardly see the background.

Poinsettias!!!
What a gorgeous fabric, indeed!!!

The quilting is a C-stitch. Once mirror imaged, it looks like puffy clouds.  I chose a dark purple for the binding, giving it a royal look - in my opinion.

Bound & Labelled
Oh how I love these colors together.

The finished quilt is 40" by 45"  and I am sure it will make a little girl very happy...someday.
For now, I keep it waiting for the right recipient.

You make me happy...
Terrace Garden is my 28th quilt of 2015.  It has been a roller-coaster of a ride!!!
I will be linking with my favorite linky parties.
I love hearing from you because your comments brighten my day!!!


Before I say goodbye to 2015 and wish you a very Happy New Year, I have one last thing to say...
I made three quilts for the Stillborn Bereavement Group.  They were each 32" square.

Making these quilts was a very sobering experience for me.  It definitely helped me get back on track after the supreme disappointment of the Sugarland Fall Festival.


Small quilts were quick and easy to put together.
Labelling them was the hard part.

We have a saying in India.  When you give, make sure that the left hand knows not what the right hand gives. Translation - giving should be anonymous, without any desire for recognition. 

Since all quilts must be labelled, I was definitely torn between the Indian in me and the quilter me.  I turned to the M* Forum for sage advice.  

Here is one of the replies I received.
SewLucky from Alberta said - "I label my charity quilts and sign them. One of the places I make for asks for a label with at least the quilter's first name and city. I say sign it, because it is very likely the recipient will never meet you, but the family will be very grateful to a donor named Preeti."

Thank you so much, SewLucky. 
Following the advice, I ditched my professional labels and made three handwritten labels.

Kiss Me Quick
Hug Me Now
Keep Me Close

The quilts were mailed to Sue in New York.  Thank you for all that you do for grieving parents.

Ready to mail
I honestly hope that no parent would ever be in the need of one of these quilts.  But if they do, I also hope that these quilts can bring some comfort to them.  

Few days later, I received this card in the mail.
Note
I was tearful and speechless.
I have chosen to not add these three quilts to my 2015 Quilts page. I am sure you understand. 

Wednesday, October 21, 2015

Bluegrass & Candyland

As promised, here are the first two (of the total 14) quilts that I made for the Sugarland Fall Festival.

This was the Charm Box free tutorial from the Fat Quarter Shop and it is a great pattern for using charm squares.
I watched the tutorial and said - Huh, that is wasteful!!!

So, I made my own sketch - yes, it is very sketchy.  The finished quilt would measure 36" by 41".

Sketchy Sketch
I needed 24 charms for the main quilt and 30 charms for the borders. So I grabbed a few blue-green charms, a few 2.5" white strips and went to town.

For the sake of simplicity and speed (mostly speed), I followed these steps.

Step1. Choose two charm squares that go together well. Cut one charm in half and place the second in between and stitch along the two sides. Do this 12 times, using 24 charms.

Keeping the rows numbered

Step 2. Add the vertical strips in between the charm blocks.

Step 3. Add the horizontal strips.

Horizontal Strips Added

The vertical strips in between the blocks were 2" finished, so the use of jelly roll strips was perfect. But the horizontal strips and the outer vertical strips had to finish at 1.5". So, after I sewed the jelly roll strips, I carefully trimmed them down to size.

Step 4. Add the outer strips

Step 5. Add the borders - 6 charms on top and bottom, 9 each on the sides.

Completed!!!

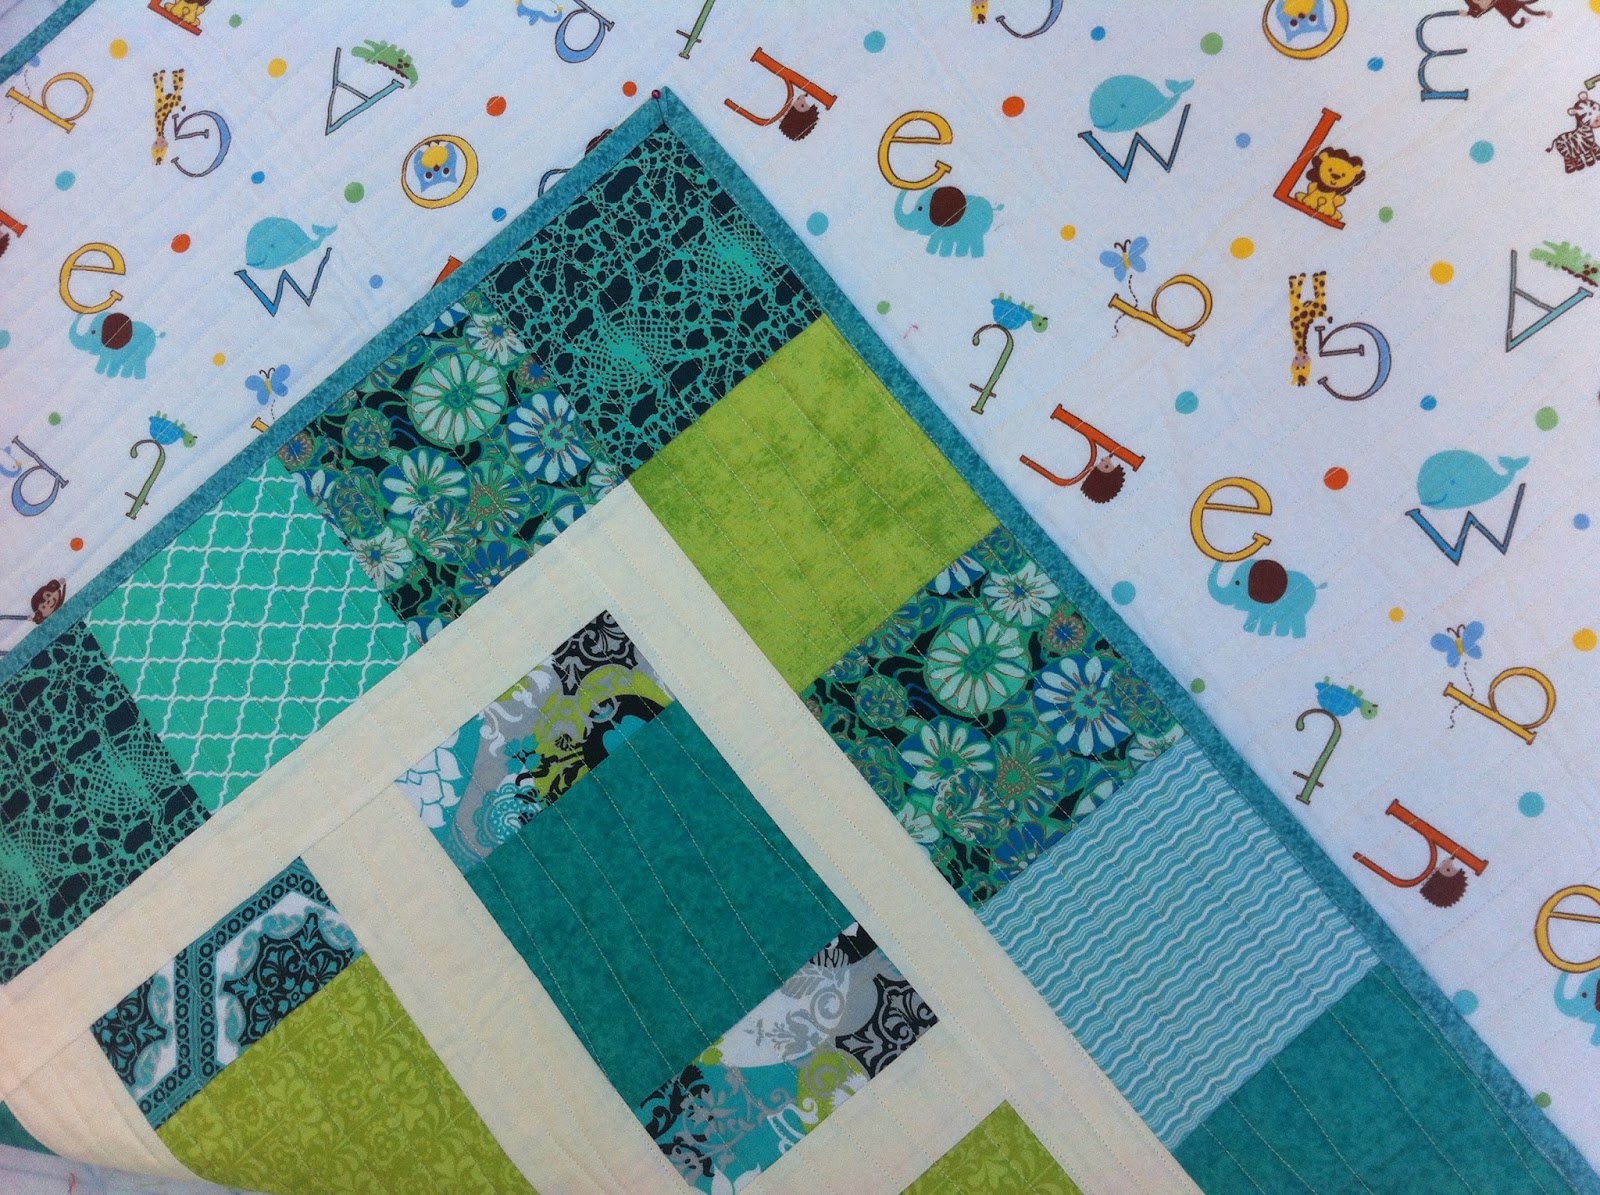
I chose my usual Warm & Natural batting and this cute alphabet/animal print for the backing.

Baby Friendly Backing

Quilting had to be super simple too. I quilted using gentle curves, in one direction only.
The binding is a turquoise blue/green near solid that matches the front and the back perfectly.

Super Simple Speedy Quilting

Labelled, yeah!!!

Matched Binding!!!

You make me happy

Bluegrass

Since this was a successful completion, I was pumped.  Therefore, I decided to use my energies to make another quilt but this time in more girly colors.  

Meet Candyland.
Bright & Happy
It is extremely rare that I will like all the fabrics in a charm pack or a layer cake. Lili-Fied is an exception.  I bought Lili-fied layer cake on Craftsy when it was on super sale and I fell in love with it.

For Candyland, I cut up the layer cake into charms and followed the same procedure as Bluegrass.
In love with Lili-fied

Backing - Yummy!
Not only the backing colors matched the Lili-fied line, they also decided the name of the quilt - Candyland.

Pink and Orange

Labelled
The quilting is simple curvy lines, one direction only. No turning and super speedy.  Here are few more pictures, because there is no such thing as too much eye candy.

Hot Pink Binding

Binding matches both sides!!!

My sunshine...

Candyland
As I write this blogpost, Bluegrass is sold. But Candyland is yet to find a loving home.  One day, I am sure, it will make a little girl drool, just like I am doing right now.

If you are reading, please write to me. I love to hear from you.