Showing posts with label Pieced backing. Show all posts

Monday, November 18, 2024

Island Batik Dresden Challenge and Bloghop

Island Batik November Challenge requires us to make a Dresden Quilt using our assigned Summer 2024 collection.

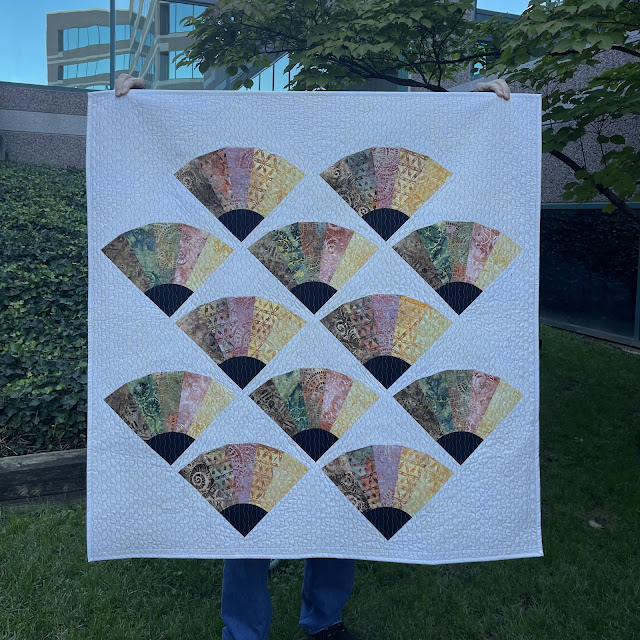
Here is my response. I have named it "Like It Or Not" (LION). LION finished at 45" by 46".

Vintage Fans, 45" by 46"


I received Peach Blossom,  an original collection by Claudia Pfeil. 


Fabrics


There are so many options for Dresden Plate designs. I could use a skinny Dresden Ruler (12 degrees) to make 30 blades per circle or a double Dresden (36 degrees) to make 10 wide blades per circle. I chose the 18 degree ruler. 

I wanted to make a modern design but felt limited by the subdued color palette. I tried several designs but they did not inspire me. Honoring the vintage vibes of the fabric collection, I settled for the classic Grandma's Fans. 


EQ8 Mock-Up

The First Block

I chose Meringue (Island Batik Neutral) as the background and Island Batik Solid Black as the accent. I used 10 of the 20 fabrics in the collection.


Piecing in Progress


All Blocks in Place


I used Schmetz Microtex 80/12 Needle for both piecing and quilting.  I used Aurifil Thread 50wt for piecing and 40wt for quilting.  The batting is Thermore by Hobbs.


Marked and Ready for Quilting


Quilting in Process

The binding is Meringue. 

Here are some close-ups from the photoshoot.

Understated Elegance 


Crinkly Texture


Close-up


Like It Or Not (LION)


I also made this one block. She is on the back, amid darkness, trying to protect the soul of all that is good and kind and hopeful.

Soul Sister, Dresden Skirt


Thank you, Paul!


I will be sharing with all my favorite linky parties. See full list on the sidebar.

For the giveaway, I have two scrap packs of batiks that can be yours, if you do the following:

1. Leave a comment on this blogpost.

2. Provide your email. If I do not have your email, you will not be entered into the drawing.

I won't be showing pictures of the scraps. However, if you are the winner, I will reach out to you to ask for your favorite colors, before making the scrap pack for you.

If you are the lucky winner, not in the US, you can get any pattern of your choice from my Etsy Shop. If you don't want/need any more fabric, please do leave a comment and let me know and I won't enter you in the drawing.

Giveaway Update - The two winners are #23 and #44. Emails have been sent.

I will announce the winners next week - 11/25 or11/26, depending on how scrappy I feel. Hang in there and big, squishy hugs!


Below is the complete list of Ambassadors, the collections they’ll feature in their projects, and their scheduled post dates:

WEEK 1

November 4:

November 5:

November 6:

November 7:

November 8:

Blog Hop Round-Up Week 1 and Giveaway

WEEK 2

November 12:

November 13:

November 14:

November 15:

Blog Hop Round-Up Week 2 and Giveaway

WEEK 3

November 18:

November 19:

November 20:

November 21:

November 22:

Blog Hop Round-Up Week 3 and Final Giveaway

WEEK 4

November 25:

November 26:

End of Blog Hop + Final Round Up

Wednesday, October 23, 2024

Pesto Mushrooms

I have a new finish and I am so excited to show it to you!

Meet Pesto Mushrooms :-)

Pesto Mushrooms


When I was asked to make a Birthday Quilt for a 6-year old boy who loves the color Green and is fascinated with Mushrooms, I said Yes, please :-D

The Pesto (Green Fabrics) was the easy part.  I wasn't sure how to incorporate mushrooms.

Pieced or Appliqued? Small or Large? A mix of large portabellas and tiny enokis?

I turned to EQ8 and found a template for mushroom applique.  BINGO!!!! In EQ8, the dots are applique as well. I think I can do with using dotted fabric instead of adding each dot. Insert eye roll here.


EQ8 Mock-up


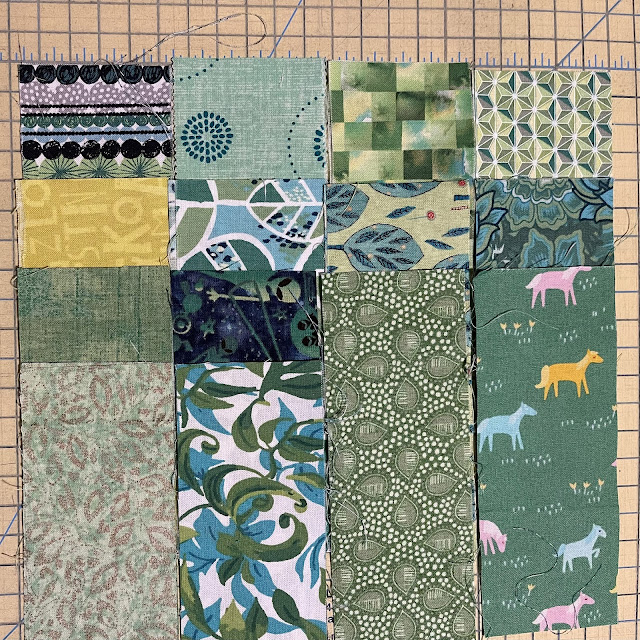
I had fun raiding my box of green scraps and I found plenty of 2.5" strips in various lengths. 

Variety of Greens!!!


Chocolate Dots Added


Making the base blocks was a simple process. Making the mushrooms was a fun albeit a multi-step process.

I transferred the three shapes - the mushroom cap, the gills, and the stem on to a thin cardboard from a box of cereal. I cut out the three shapes and traced them on to the Steam-A-Seam 2 sheets. Repeat 24 times :-) It took six sheets.

I then rough cut all 75 shapes out of the Steam-A-Seam 2. 

Then I chose fun fabrics. Bright dots for the caps, light yellow/beige for the gills and brown for the stems. The next step required peeling the 75 paper slivers and sticking the sticky side (of Steam-A-Seam 2) to the wrong side of the fabrics.

Now I had to carefully cut the exact shapes, ensuring the slight curve of the mushroom caps and the gentle line of the gills. This took a while. Oh but it was so worth it.


The first Mushroom

The second one!


One 5" square

Two Mushroom Caps (very carefully cut)


Was I ready to add the mushrooms to my blocks? Not yet. 

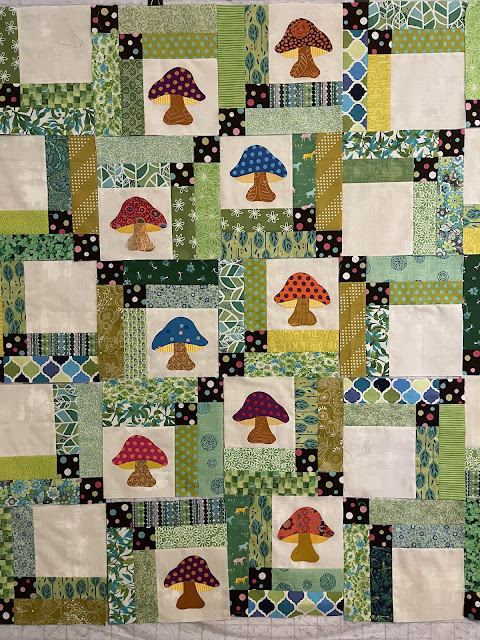
I arranged the base blocks on my design wall in the desired layout, making sure that no two white squares were touching.

I did not add the mushrooms to the individual blocks until after the layout was finalized. I wanted to make sure that all mushrooms were upright, whereas the blocks could be oriented in any way.

Once I was happy with the layout, I started adding the mushrooms, one column at a time.


Adding Shrooms

I added one mushroom at a time, peeling away the paper, ironing and stitching in place and returning it to the design wall, before picking the next block.
 

Stitched in place

Step 1 - Make the Base Blocks. Set aside.

Step 2 - Make the Mushroom Parts (Cap, Gills and Stem). Set aside.

Step 3 - Finalize the Layout, separating the white squares.

Step 4 - Working with one block at a time, place and iron the Mushrooms. Gills first, followed by the stem and lastly the cap on top of both (I messed up the first one). Stitch in place.

Oops NO!!!

Step 5 - Stitch the mushroom blocks into a flimsy, making sure that the layout stays intact.

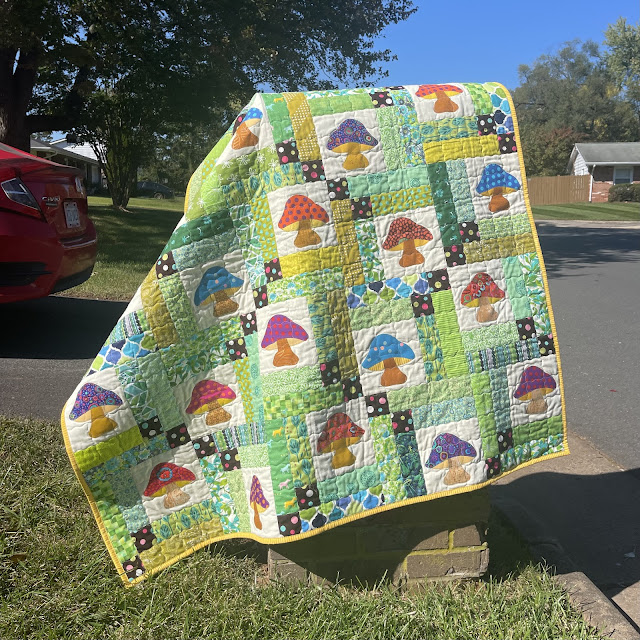
It is fun and looks simple but there are many steps and the order of the steps is important! Here is the completed quilt!

Such a happy quilt, 50" by 50"

Honestly, I think the whole quilt is a tad too busy, with so many greens, chocolate dots and all the bright mushroom caps. I could have used fewer greens, or a solid brown instead of dots. But for a six-year old, who needs a lot of stimulation, it will do just fine.

Pesto Mushrooms finished at 50" square. The backing is pieced from a directional mushroom fabric. I added narrow brown strips (when joining two pieces) to avoid the weird look of an ill-matched pieced print. All mushrooms are upright - even in the backing!


Pieced Backing

A yellow striped binding completes the look. 

Yellow Striped Binding

Let me show a few close-ups. These mushrooms are so stinking cute.

Labelled


Bright and Dotty


Thank you, Kaffe


Who says mushrooms grow in damp, dark places. Look at these beauties thrive in the bright sun :-)

My Happiness Mushrooms


Red and Pink


And one last look!

Such Fun Guys!


Once the quilt reaches its intended recipient, I will add another picture. I am hoping for big smiles. If Pesto Mushrooms made you smile, please let me know. 

Sharing with all my favorite linky parties. See full list on the sidebar.


Thursday, September 7, 2023

Island Batik Challenge & Blog Hop

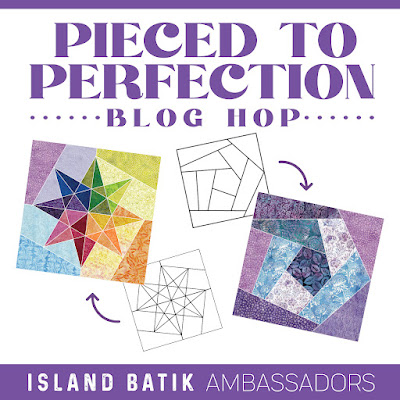
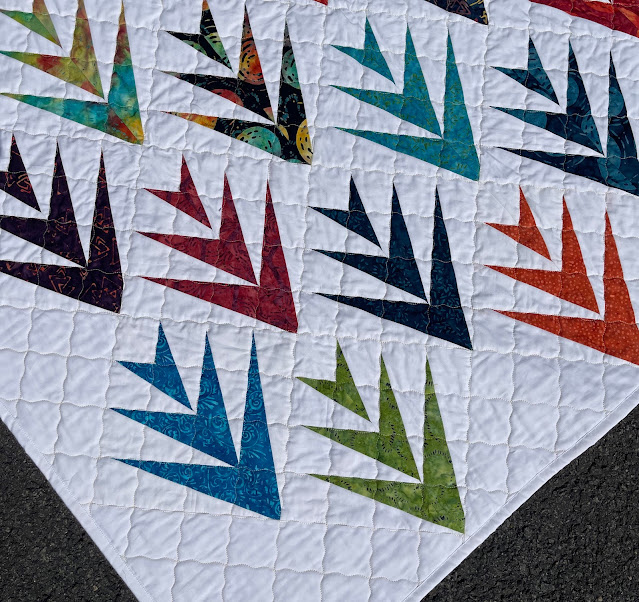
The September Island Batik Challenge and Blog Hop is called Pieced to Perfection. We were required to make a paper-pieced project at least lap sized, using as many different fabrics as possible from our assigned collection.


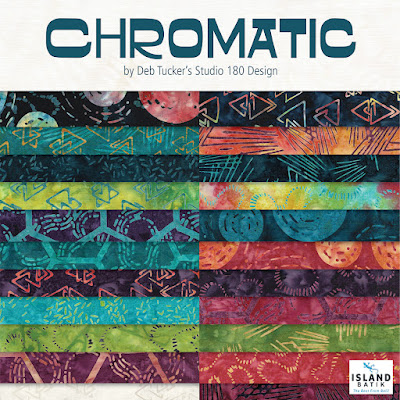
I received Chromatic. It is an original collection designed by Deb Tucker of Studio 180 Designs.


Chromatic Bundle


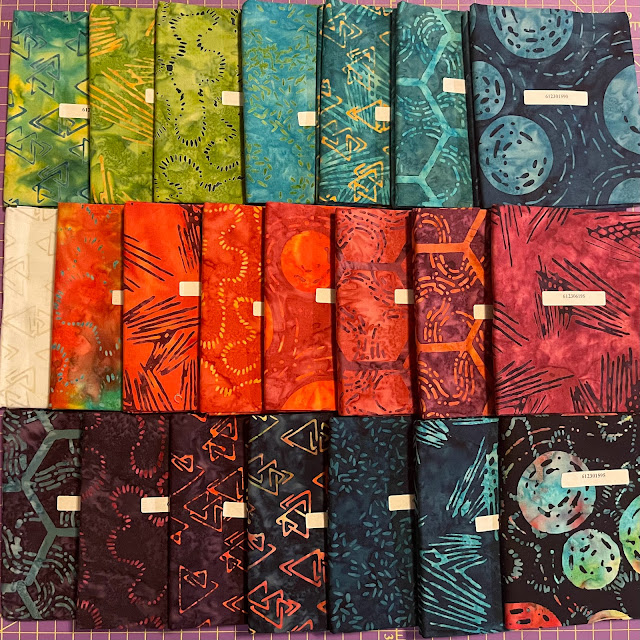
Chromatic Fabrics

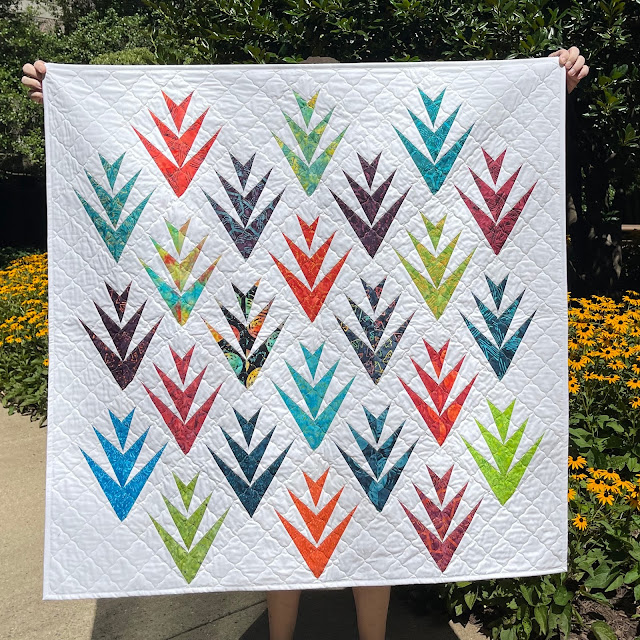
And here is my response to the challenge!

Bromeliad Garden


I chose "The Palm" block from EQ8 Block Library (under Old favorites). 

The on-point layout uses 24 blocks. I used 21 (out of the 22) fabrics from the Chromatic collection. I used three fabrics from Island Batik Basics, so that each leaf uses a different fabric. I chose the solid white background for maximum contrast with these dark/bright fabrics. 


I started with making an audition block and after about three attempts, I was ready to roll.

Audition Blocks


I chose this block because it gives me the opportunity to show off every fabric (except the white one) from the Chromatic collection.  

Since paper-piecing is not my strong skill, I wanted a block where imperfections did not cause a fatal flaw. Leaves, you know, are not exact :-) Further, since each leaf is its own block, a mismatched/imperfectly shaped leaf does not mess up the adjacent one.

Imagine the horror of mismatched seams, especially after all the effort of piecing and tearing out (hair and) paper. 


On the Design Wall

I used Aurifil Thread for piecing (50 wt) and quilting (40 wt). I used Schmetz Microtex 80/12 needle for both piecing and quilting. I chose Thermore batting from Hobbs

Completed Quilt


Since the quilt finished at about 47" square, I pieced the back, using the leftover fabrics from the front.
I like to think that I "zipped" the two white pieces together :-D

The quilt is named Bromeliad Garden, for the shape of the leaves.

Pieced (Zipped) Backing


I quilted diagonal lines using my walking foot. The Backing and Binding are Island Batik Solid White. 

Quilting Detail 


Of course I added my label and thanked my quilt model for his patience and support of all my quilty endeavors. He was rewarded handsomely for his efforts :-)

If you'd like to win a handsome reward (in Island Batik fabric), please leave me a comment on this post. I will pick two winners on September 15. 


Be sure to check each of the Ambassador’s posts as many of them will be offering their own giveaways – all the more reason to enjoy the Pieced to Perfection Blog Hop!

The full list of Ambassadors’ names, collections they will be using in their projects, and their post dates are as follows:

WEEK 1

September 5

Elita Sharpe, Busy Needle Quilting

Denise Looney, For the Love of Geese

September 6

Sandra Starley, Textile Time Travels

Sarah Pitcher, Pitcher’s Boutique

September 7

Connie Kauffman, Kauffman Designs

Brenda Alburl, Songbird Designs

Preeti Harris, Sew Preeti Quilts (You are here)

September 8

Blog Hop Round-Up Week 1 and Giveaway

WEEK 2

September 11

Brittany Fisher, Bobbin with Brittany

Gail Sheppard, Quilting Gail

September 12

Susan Deshensky, Lady Blue Quilts

Maryellen McAuliffe, Mary Mack Made Mine

September 13

Emily Leachman, The Darling Dogwood

Anorina Morris, Samelia’s Mum

Jennifer Thomas, Curlicue Creations

September 14

Claudia Porter, Create with Claudia

Victoria Johnson, Forever Quilting for You

September 15

Blog Hop Round-Up Week 2 and Giveaway

WEEK 3

September 18

Lana Russel, Lana Quilts

Lisa Pickering, Lisa’s Quilting Passion

September 19

Randi Jones, Randi’s Roost

Suzy Webster, Websterquilt

September 20

Mania Hatziioannidi, Mania for Quilts

Pamela Boatright, Pamela Quilts

Leah Malasky, Quilted Delights

September 21

Renee Atkinson, Pink Tulip Quilting

Reed Johnson, Blue Bear Quilts

September 22

End of Blog Hop + Final Round Up


Finally, the winners of the Avantika Quilt Pattern are comments #9 (Lisa Marie) and #42 (Sara). Emails have been sent.