Showing posts with label Mushrooms. Show all posts

Wednesday, October 23, 2024

Pesto Mushrooms

I have a new finish and I am so excited to show it to you!

Meet Pesto Mushrooms :-)

Pesto Mushrooms


When I was asked to make a Birthday Quilt for a 6-year old boy who loves the color Green and is fascinated with Mushrooms, I said Yes, please :-D

The Pesto (Green Fabrics) was the easy part.  I wasn't sure how to incorporate mushrooms.

Pieced or Appliqued? Small or Large? A mix of large portabellas and tiny enokis?

I turned to EQ8 and found a template for mushroom applique.  BINGO!!!! In EQ8, the dots are applique as well. I think I can do with using dotted fabric instead of adding each dot. Insert eye roll here.


EQ8 Mock-up


I had fun raiding my box of green scraps and I found plenty of 2.5" strips in various lengths. 
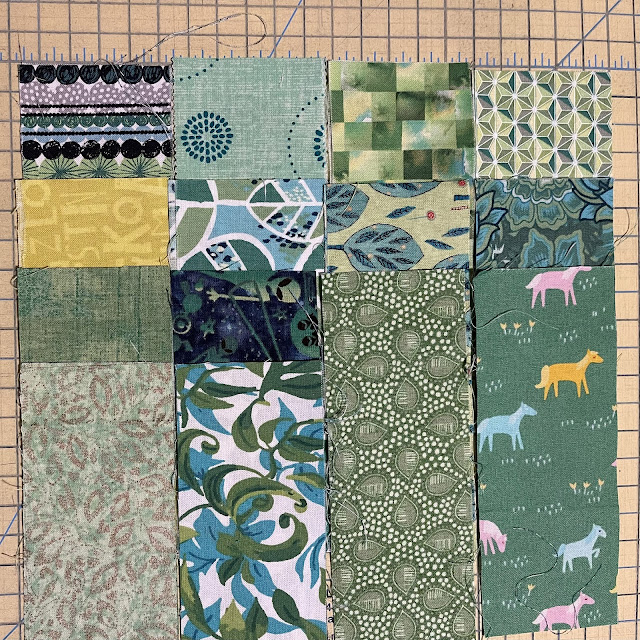
Variety of Greens!!!


Chocolate Dots Added


Making the base blocks was a simple process. Making the mushrooms was a fun albeit a multi-step process.

I transferred the three shapes - the mushroom cap, the gills, and the stem on to a thin cardboard from a box of cereal. I cut out the three shapes and traced them on to the Steam-A-Seam 2 sheets. Repeat 24 times :-) It took six sheets.

I then rough cut all 75 shapes out of the Steam-A-Seam 2. 

Then I chose fun fabrics. Bright dots for the caps, light yellow/beige for the gills and brown for the stems. The next step required peeling the 75 paper slivers and sticking the sticky side (of Steam-A-Seam 2) to the wrong side of the fabrics.

Now I had to carefully cut the exact shapes, ensuring the slight curve of the mushroom caps and the gentle line of the gills. This took a while. Oh but it was so worth it.


The first Mushroom

The second one!


One 5" square

Two Mushroom Caps (very carefully cut)


Was I ready to add the mushrooms to my blocks? Not yet. 

I arranged the base blocks on my design wall in the desired layout, making sure that no two white squares were touching.

I did not add the mushrooms to the individual blocks until after the layout was finalized. I wanted to make sure that all mushrooms were upright, whereas the blocks could be oriented in any way.

Once I was happy with the layout, I started adding the mushrooms, one column at a time.
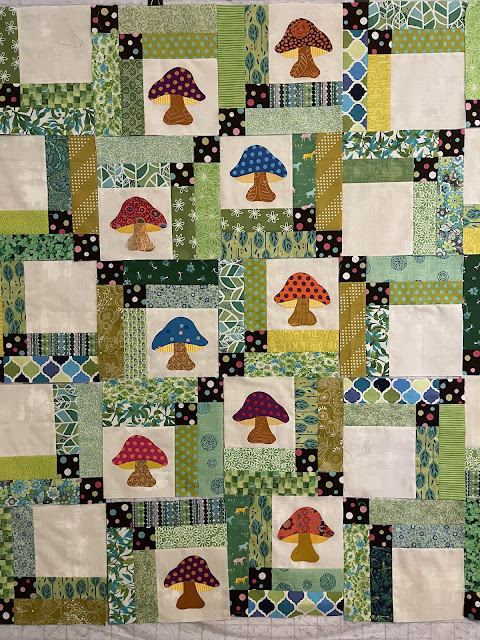

Adding Shrooms

I added one mushroom at a time, peeling away the paper, ironing and stitching in place and returning it to the design wall, before picking the next block.
 

Stitched in place

Step 1 - Make the Base Blocks. Set aside.

Step 2 - Make the Mushroom Parts (Cap, Gills and Stem). Set aside.

Step 3 - Finalize the Layout, separating the white squares.

Step 4 - Working with one block at a time, place and iron the Mushrooms. Gills first, followed by the stem and lastly the cap on top of both (I messed up the first one). Stitch in place.

Oops NO!!!

Step 5 - Stitch the mushroom blocks into a flimsy, making sure that the layout stays intact.

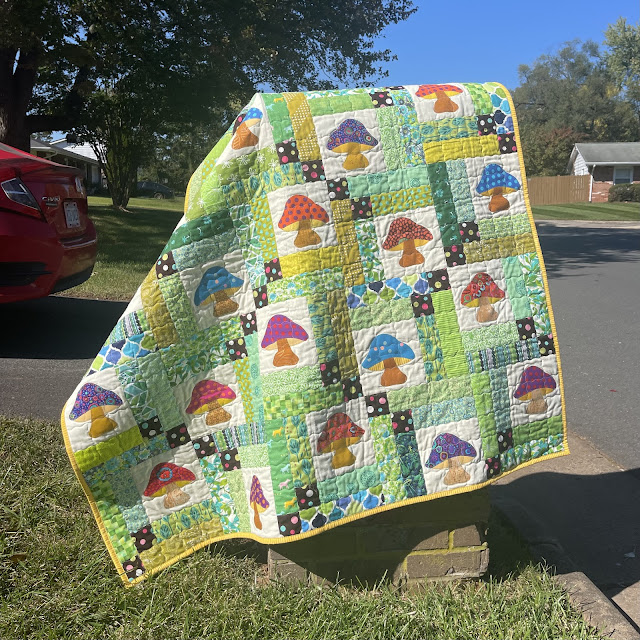
It is fun and looks simple but there are many steps and the order of the steps is important! Here is the completed quilt!

Such a happy quilt, 50" by 50"

Honestly, I think the whole quilt is a tad too busy, with so many greens, chocolate dots and all the bright mushroom caps. I could have used fewer greens, or a solid brown instead of dots. But for a six-year old, who needs a lot of stimulation, it will do just fine.

Pesto Mushrooms finished at 50" square. The backing is pieced from a directional mushroom fabric. I added narrow brown strips (when joining two pieces) to avoid the weird look of an ill-matched pieced print. All mushrooms are upright - even in the backing!


Pieced Backing

A yellow striped binding completes the look. 

Yellow Striped Binding

Let me show a few close-ups. These mushrooms are so stinking cute.

Labelled


Bright and Dotty


Thank you, Kaffe


Who says mushrooms grow in damp, dark places. Look at these beauties thrive in the bright sun :-)

My Happiness Mushrooms


Red and Pink


And one last look!

Such Fun Guys!


Once the quilt reaches its intended recipient, I will add another picture. I am hoping for big smiles. If Pesto Mushrooms made you smile, please let me know. 

Sharing with all my favorite linky parties. See full list on the sidebar.


Monday, August 7, 2017

Chaos and Order

Clay's quilt was well-received. He promptly put it on his bed, took a picture and sent it to me with a thank you note. I was so gratified!!!

Clay's Quilt

And then, the next day, I received a separate card from his wife plus a gorgeous silver necklace that she made for me.

Jewelry + Me = Happiness

My expression says it all.

_________________________________________________________________

So, what else is going on, you may ask.

There were 31 snowball blocks in Clay's quilt. This means there are 31 times 4 = 124 HSTs, tempting me to make something with them.

Bonus HSTs


Working on Clay's quilt, I realized that I have very little purple in my stash. Had to correct that problem.

Purples

In doing so, a couple of other fabrics just jumped into my cart.


What is a girl to do? I lovingly adopted them all.

I was so focused on achieving the July OMG, that the Honey Pot bee blocks had fallen behind. Now, I jumped into it with gusto.

Cute Mushrooms

Magic Mushrooms

The mushroom block was super-fun and so cute. I made two of those.  I also made the tree blocks from a few months ago.

Christmas Trees

This lattice block was a little more complicated. But it still turned out fine.

Urban Woven


There are four more bee blocks to make and one is paper-pieced. AAAAAAAAAHHHHHHHHH.

_________________________________________________________________

I do have a goal for August but I do not want to share pictures as yet.  It is a twin-bed size quilt for a boy. Here is the backing and the binding. The blocks are in the process.

Backing & Binding for August OMG

And speaking of wide backing, I bought another one, since Connecting Threads is having a sale on wide backings - 25% off.

Wide Backing from Connecting Threads

As you can see I have plenty of chaos to sort through, projects to organize, fabrics to choose, and a post (or two) to write.

If order comes from chaos, then I am half way there.

So what shall I focus on? The boy quilt, the leftover HSTs, the bee blocks or something else.  What represents chaos for you? Do let me know. I will be connecting with all my linky parties.

This blogpost contains affiliate links

Wednesday, October 28, 2015

Seashore Rails & Jewel Box

These are quilts 3 & 4 from the Sugarland Fall Festival.

Meet Seashore Rails, the simplest rail fence pattern.  This is the pattern I pick when I do not want to think, when I do not have the patience to measure once, leave alone twice, when I do not want to cut fabric.

Seashore Rails
This is the holy grail (and the savior) for all those (me included) who like the concept of handmade but may not always have the nine yards of patience.

Take two strips of color, one strip of white. Stitch them along the length, with the white in the middle.
Cut into squares. Voila, you have your blocks!!!

Black Border, Green Binding

Arrange your blocks - one horizontal and one vertical, add a border to make it all come together and you have a quilt top!!!

When Eleanor Burns said - Quilt in a Day, I am sure this is what she meant.

I chose this mushroom fabric for the backing.
Do you like Mushrooms?


I had to choose easy and quick patterns since I really cranked out 14 of these in four weeks (My craziness is now well-established).  Therefore, choosing bright happy fabrics was really the key!!!

Matching binding to both the front and the back was an essential ingredient in making the quilt appealing.  I think the green binding in the front works only because it stands out against the black border, whereas it appears a bit blah next to the teal/aqua blocks.

Quilted and Bound

As far as the back, well that green really adds to the mushroom fabric, even if I say so myself (blush).

Green Binding - Multicolored Shrooms!!!
Can you see the quilting? Me neither.

The blocks finish at 6", the quilt without borders is about 36" square and with 2.5" strips border added, it finishes at about 40" square.

I quilted using a decorative stitch (looks like the letter C), making the appearance of clouds, as one line looked like Cs and the next being a mirror image.

Ooh, like a day at the Beach!!!
And one more picture...
Labelled!!!
Once Seashore Rails was done, I had a few blocks leftover...leading to the next quilt - Jewel Box.

Seashore Rails was definitely boyish. Therefore, I chose to add some non-blues (greens/purples) to make Jewel Box, so that it was a more gender-neutral quilt.

Remember, while I am making these, I wanted an even split between boy and girl quilts, so that the quilts could appeal to all.


Can you see the rail fence blocks in between the green and purple box blocks?

I chose a bright purple border for Jewel Box, to highlight the purple and take the attention away from the teal/aqua blocks. 
However, the exact same green binding works against the purple too.  Happy coincidence, indeed.

Ok, are you ready for this? This is big and scary!!!

Backing - Funny and Colorful!!!
And see, the green binding works beautifully with the backing too. The quilting gods were smiling upon me!

Quilted the same way as Seashore Rails. Jewel Box also finished at about 40" square. 


Finally, I can see some quilting in this picture.
Scary & Adorable
 Did you think that I forgot the label? No, I am too vain for that.
Labelled!
OK, just one more picture.  Can you see the cloud effect quilting in the picture below?
Looks like this monster is peeping from behind the wall to yell - BOO!!!

BOOtiful!!!
 
 
I hope these simple patterns and bright fabrics bring some measure of joy and inspiration to your day. Your bright comments definitely bring joy to mine!!!