Showing posts with label Orphan Blocks. Show all posts

Friday, March 6, 2020

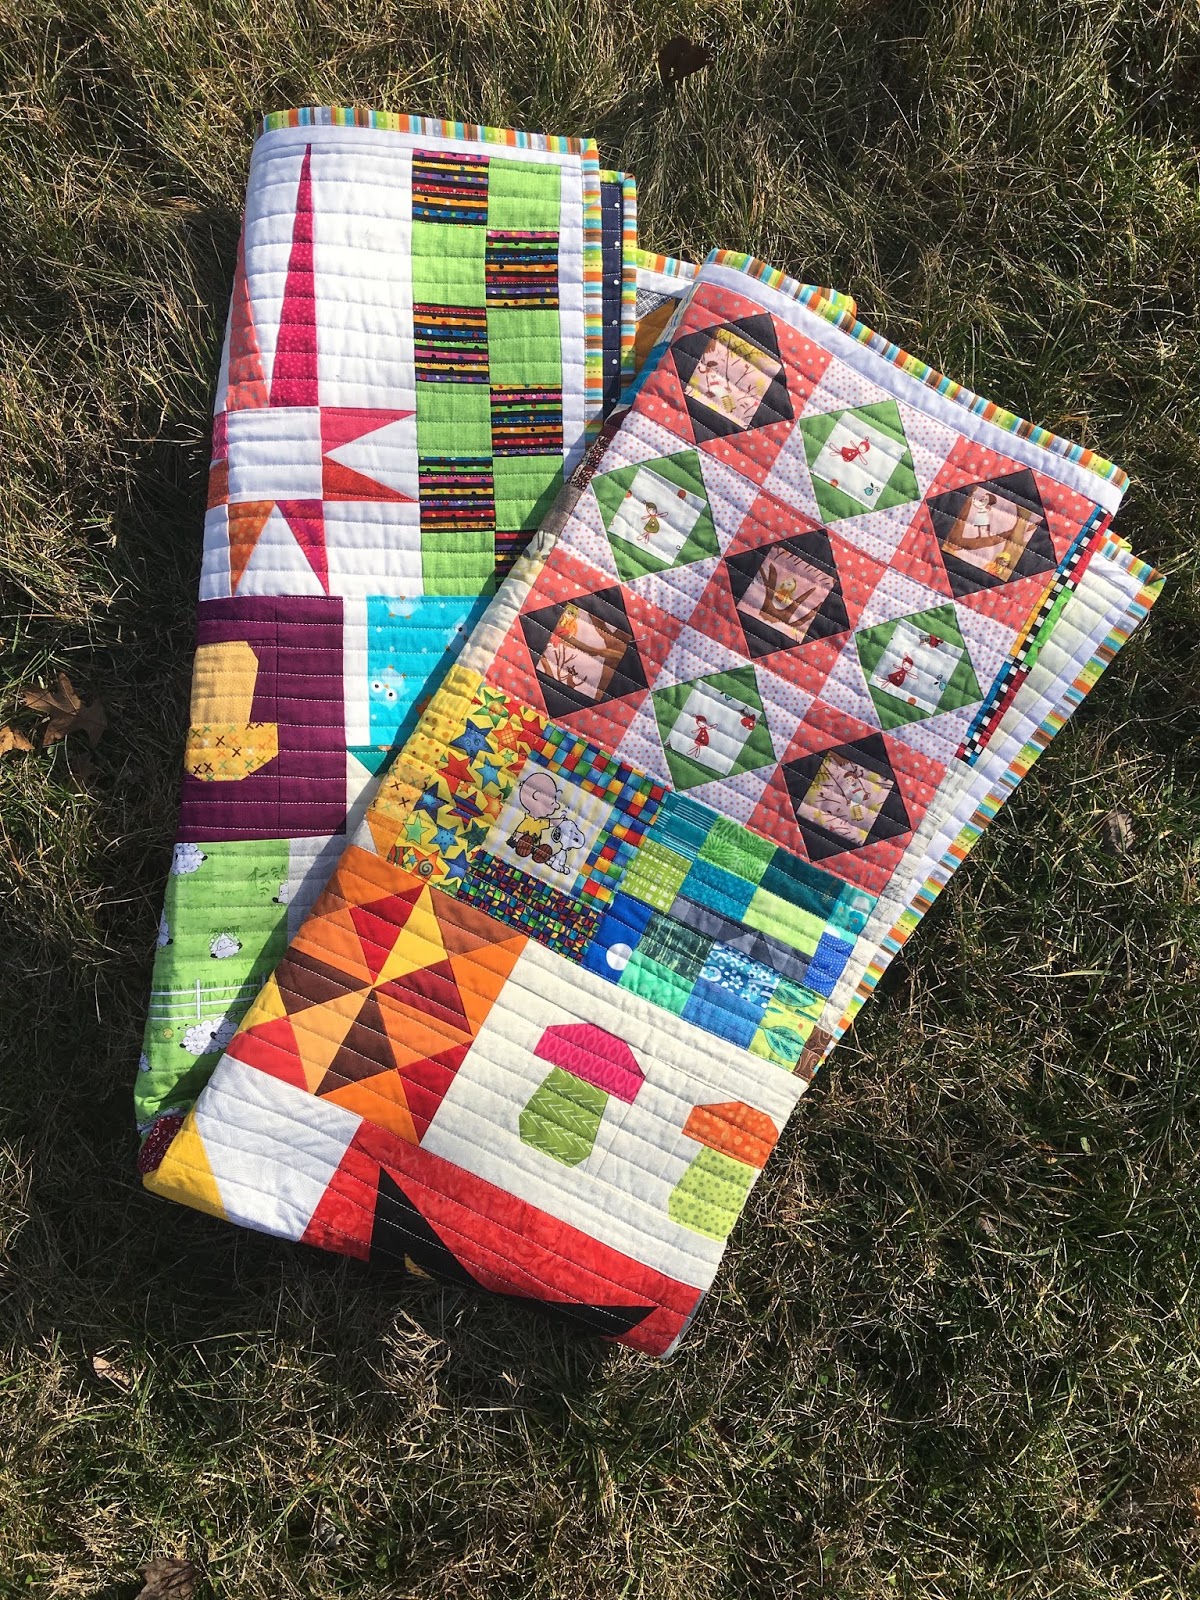
Pandora's Box

Paul: There is a lot going on here.
Me: Yup. Do you like it?

A new finish

Paul: It kinda works.
Me: Doesn't it?
Paul: What is this one called?
Me: Pandora's Box.


Orphan Blocks

Paul was shocked!!!  He proceeded to relate the story where all the monsters (death and sickness) were unleashed and all that was found at the bottom of the box was Hope.

Gathered and Captured


I tried to (somewhat calmly) explain. I did not open the Pandora's Box. I did not release the monsters. I captured them and put them back in the box.


Flimsy - Before the Skinny Borders were added


Paul: So you are Pandora?
Me: No and this is not a box. It is a concept that all these orphan blocks (bee blocks and audition blocks and orphans too) were floating around and creating chaos. And now that chaos is captured and showcased in a quilt!!!
Paul: You are so full of it.
Me: You totally get me :-)

Color!!!


Diversity :-)

Although these random blocks were captured into a flimsy in August 2018 (Motivated by Mari), other projects took precedence and the flimsy became an UFO.

And festered while other projects/quilts took precedence. But now that it is done...I am thrilled with the finish.

So much is happening...

Skinny Border

A skinny border was required to protect some points.  Pandora's Box flimsy measured 56" by 58".
At this size it made more sense to piece a backing than to cut up precious wide backings.

Pieced Backing

Striped Binding

A spicy striped binding tamed all the naughtiness while keeping things upbeat.

Paul: You did not follow my advice on pieced backing?
Me: Not this time.
Paul: Why not?
Me: I just wanted it done as soon as possible.
Paul: Um Hmmm.
Me: If I make all my pieced backings the same way, won't you call me a one-trick pony?

Labelled


Joyful

I proudly added my label.
Time for a happy dance. Another UFO slayed. Monsters captured.
Absolute Joy!!!

Pandora's Box


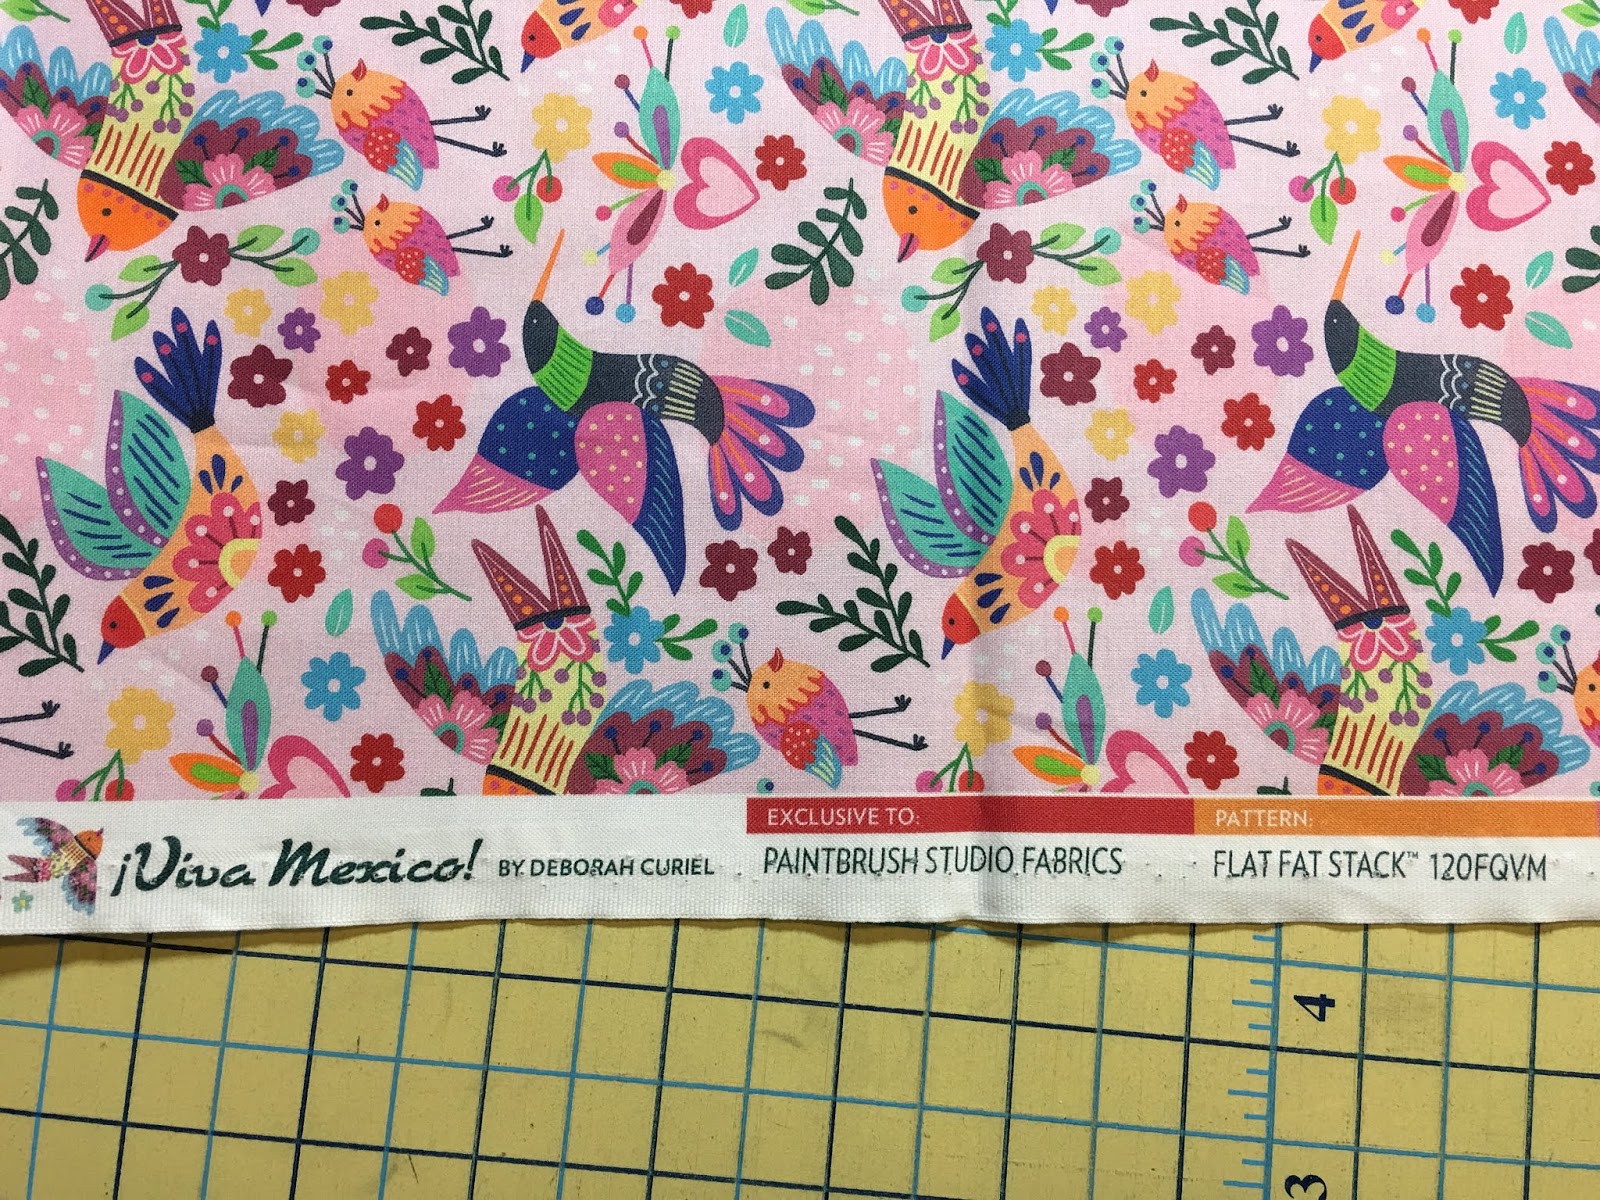
Speaking of joy, I acquired gorgeous new fabric at Quiltcon.  It is a fat quarter bundle called Viva Mexico from Paintbrush Studios.  The ten fat quarters are printed on a continuous piece of fabric.


Picture from Paintbrush Studios


I went to Quiltcon with a strict policy of "Only Experiences, No Acquisitions"
But when Paintbrush Studios announced the Buy One, Get One Free for all FQ bundles...the firm stitches of my resolve were unraveled by the seam-ripper of temptation.


Gorgeous Colors

Juicy and Bright


I cannot wait to make something with this bundle, especially these bright pinks.

Viva Mexixo

Yummy Pink


March is here and so is the new color for Rainbow Scrap Challenge 2020.
Stick around, browse for a bit and leave a comment (naughty or nice), while I go herd my teals (bluish-greens and greenish-blues).

Bluish Greens

Greenish Blues

Greenish Blues on the left. Bluish Greens on the right


If you have questions about block patterns in Pandora's Box quilt, please go to this previous blogpost, which is laden with links.

Linking with Angela and all my other favorite linky parties. See full list on the sidebar.
As usual I'd love to hear your thoughts on anything, but particularly on Pandora's Box.

One last look!


Wednesday, August 1, 2018

Motivated by Mari

Mari made a quilt - Misfit Toys.

Misfit Toys is now going to AQS Quilt Show in Virginia Beach!!!  Mari shared this fantastic news with me on Friday. I jumped with joy for her.

With Mari

She gushed, I listened.
And in that moment, I knew I had to drop everything and make a quilt using up my leftovers - bee blocks (Honey Pot Bee) and orphan blocks and audition blocks.

Sandra and Elizabeth

I met Elizabeth in Buffalo. She mentioned a quilty term that I had not hear before - Coping Strips.
When the blocks are of varying sizes, she adds strips to the smaller blocks to bring them to the requisite size. These strips are aptly named coping strips.

Now, some folks call them sashing but I believe sashing is used with uniformly sized blocks.
See you can use sashing strips after you have used coping strips to make all blocks uniform :-D

I needed coping something but I chose to use coping blocks (also used coping strips in two places). Or you could call them filler blocks. The Charlie Brown+Snoopy block is a coping block. The improv slab next to it was leftover from Fire Pit, used also as a coping block.

Coping Blocks - Charlie Brown, Cool Leftover Slab from Fire Pit, Warm QSTs


I made coping blocks from leftover triangles discarded from Curry Favor (picture above) and from those leftover from making Doggone Cute blocks for KaHolly. 

Yellow Gray QST is a coping block using leftovers from Doggone Cute blocks

The leftover blocks from Charmed Encore worked perfectly as coping blocks.

Coping Blocks - Framed Charm Squares, 4 HSTs, and a house
I also used a coping strip to bring the red tree block to size. See picture above.
Simple 4-patch blocks made perfect coping blocks, sometimes used singly sometimes in a series.

4-patch blocks, used in a series - left corner

There were some composite HSTs leftover from Animal House. They became houses with mix and match roofs. I tried the same pattern in a larger size. Did not work.  Kinda loses its appeal in that size.

Here they are - three modest houses and one Mac-mansion.

Three modest houses and one Mac-Mansion - UGH

I loved the Blended Scraps Block so much that I made a whole quilt - Shadow of Light. The first block from that endeavor is near the top left.

Finished Flimsy

My experiments with paper-piecing are all here - the black/red/yellow star that was a moderate success, the very pointy 1.5 star, the Tall Tales book block which was a huge success, the two mushroom blocks where I used freezer paper and the As-You-Wish block (envelope+letter) which I declined to paper piece.

Paper Piecing Adventures - Star Blocks and Mushroom Blocks

The lattice block next to the tree block also came from the Honey Pot Bee. As did the Pantry Jar block and the Star Kisses block.

Star Kisses block from the Honey Pot Bee

The BHQ Economy Square Block had me whining because it has 81 pieces in just one block.

The 81 piece Economy Square Block

Before I wrote my most popular tutorial, I made an audition block in purple and red. It finally found a place in here.

Audition Block - Purple Red and Cream

I enjoyed making the strawberry block. Made in three colors. You can see the red one below. Saving the pink and orange ones for the Quilt Guild BOM later this year.
Did not enjoy the Echo block. This was a perfect place to get rid of it, but if you love it here is the link to the tutorial.

The Strawberry (love) and Echo (hate) blocks

This flimsy also has one of the discarded blocks from The Queen's Necklace (top row), next to the leaf block, which I loved so much that I have made several. Yes, they will make a quilt - just not yet.

Leaf, Kaleidoscope and Tall Tales Blocks. Pantry Jar, As You Wish and Tree Blocks
In the picture above, there is a coping strip (with a snail) next to the leaf block. I recently got that sliver of a fabric in the scrap bag that Sandra brought for me when we met in Buffalo!!!

This is one quilt with so many stories!!!

Some posts are laden with pictures. This one is definitely laden with links. I am trying to give credit where credit is due. It is possible that I missed some. If so, please ask and I will supply the link/inspiration in the comments.

Thank you Mari - I started because of you.

Thank you Sandra - I completed it because of you. So that I could make it to this Dreami party.

Lots of color = One Happy Quilt

Who has inspired you lately? I'd love to hear from you. 
I will be liking with all my favorite linky parties, see sidebar for full list.

_____________________________________________________________________

OOPS!!!
I almost forgot. Here are the winners from the giveaway.


1. Solids Kona FQ Bundle to Dottie Bishaw (#30) and Gran Chris (#52)
2. Four warm prints FQs to Kristin (#74) and four cool prints FQs to Frederique (#5)
3. Pink/red scraps to Lisa Marie (#10) and Blue/green scraps to Clare M(#80)

Emails will be sent to the winners later today, unless you are a no-reply blogger, in which case please send me an email. If I do not hear from you in a week, you will forfeit your prize and I will pick someone else.

Thank you so much for celebrating with me. Big hugs to you!!!


Saturday, November 1, 2014

Diwali, Rangoli & Mug Rugs

Last Thursday (10/23) was Diwali - the festival of lights. I decided to take the day off.
What did I do most of the day? SEW!!! Ha Ha Ha Ha.
I was making mug rugs. They are the perfect little gifts that are sure to be used. Not too involved/time-consuming as a quilt but thoughtful, all the same. Further, it is a perfect way to use up batting scraps, orphan blocks and fabric scraps that are too small for anything else.

Used Leftover Block from "Coming of Age"

I am sure there are plenty of mug rug tutorials all over the internet/blogland. And, I am not claiming that this is a new revolutionary technique. I am just honoring a request made by a dear friend at the M* forum. GrammaBabs, this one is for you!!!

MugRug1- Quilt-as-you-go (QAYG)
Here are the basic steps
1. Start with the backing fabric 81/2" square.
2. Batting size 7" square
3. We will piece the top as we quilt the three layers together
4. Fold over the excess backing on to the front and top stitch it

The actual process is described in the pictures below

Backing Fabric - 81/2" square

Leftover Batting Scrap

Batting Scraps placed together with a 1/2" overlap

Place ruler's edge in the middle of the overlapping portion

Cut through both layers of batting

Remove the skinny strip from top

Remove the skinny strip from the bottom

Put on the walking foot

Choose a ZigZag stitch

Bring the two batting scraps to the machine, making sure that they abut snugly against each other and zigzag.

Batting Scraps joined together, ready for use!!!

Trim to 7" square

Place Batting Square in the Middle of the Backing (wrong side up)
You should be able to see 3/4" of the backing on each side of the batting square

Baste. Just a small spray in the middle of the block is enough
Just peel off a corner of the backing, a quick spray and smooth the backing in place. 
Now we are ready to piece our top and quilt it too. It sounds like - having my cake and eating it too. Yes, I love QAYG!!!

Focus Piece, placed at 45 degrees in the center
I am making this one for a co-worker who has five dogs. Fitting, isn't it? 

Dark Charcoal strips to frame the doggie

Place the strip on the focus square, RST, matching the edge.
Place the ruler so that 1/4" of the strip is to the right of the ruler's edge
Using a soft pencil, mark dots on the batting along the entire length of the batting/backing.

These dots serve as a sewing guide

Sew along the entire piece from backing edge to edge. This way there are no start and stop points in quilting.

This way you have a neat quilting line and no knots to bury!!!

Add strip on the other side, make dots, stitch edge to edge.
Flip and iron. Next we will add the other two strips to frame our doggie darling!


Placed RST, marked the dots

Stitched on both sides edge to edge

Flip and iron - looking good, already.

Add next batch of strips (using scraps)

Stitched edge to edge

The second frame (yellow strips) added just like the first

Love the neat quilting lines on the back!!!
Keep adding strips around the center. This is free-form so the widths can vary and do not worry too much about precision. Add triangles in the corners.  

The MugRug is pieced AND quilted. Ready to trim.

Fold back the backing and trim the excess fabric, very carefully. DO not cut the backing fabric

Get rid of those scraps. Trim on all four sides, same way CAREFULLY!!!

Top trimmed, backing is intact (phew!!!)

To avoid binding bulk in corners, trim off the backing corners
Fold the backing corner over to the front so that it just touches the top corner. Finger press the folded edge and cut at that folded edge. Repeat on all sides. 


Stitch a scant 1/4" along the edges. This will make it easier to bind.

Ready to Bind

First, we will fold the two opposite sides. Fold the excess backing fabric in half and then fold over on to the front. Secure with pins/clips

Now the remaining two sides. Fold the corner, first. Finger press.

Fold the excess backing fabric in half along this edge, catching the folded corner

Folded in half, with corner tucked neatly

A second fold and the binding is inplace. Secure with pins/clips

I secured the first two opposite sides with pins and the second ones with clips.

Finished MugRug
In hindsight, I should have chosen a brighter backing fabric. Oh well, the next one will be improved. One Christmas present done!!! 23 to go...

Here is the detail showing squiggly stitch I used to secure the binding. 

Neat quilting lines on the back

I know that was TOO much detail and TOO many pictures. Not for the faint of heart. Do not worry. For those of us (including me) who have only 15 minutes to make something, here is a 15-minute MugRug/Coaster Tutorial.


MugRug2 - Super simplified, 15 minute project
1. Start with an orphan block (or just use a fun fabric), minimum size is 6" square
2. Place on top of batting and quilt the two layers as you please. Trim excess batting.
3. Measure the backing piece same size as the trimmed top+batting.
4. Place the backing, RST with the top+batting and mark two pins at least 2" apart.
5. Sew around using a 5/8" seam, making sure you back stitch at the beginning and end.
6. Trim the corners carefully and turn it inside out.
7. Iron flat and top stitch all around to secure the opening shut.

See pictures below
I started with an orphan block, left over from Charmed

Placed it on top of batting and quilted it.
Just a very quick squiggly stitch around the central square. You can quilt as you desire!!!

Bright, super bright backing fabric!!!

Placed the quilted top on top of the backing, RST

Place two pins, 3" apart - start and stop points for sewing

Sew all around using a 1/4" seam. Remember to back stitch at start and stop points

Trim the corners to avoid bulk. Turn it inside out through the opening

See the opening. We need to shut it
Yes, you can slip stitch it by hand, but then this will be a 20-minute project. UNACCEPTABLE!!!
So, we will just top stitch it. 
First, push out the corners using a dull point. Iron the layers flat, carefully tucking in the fabric at the opening. Top stitch to secure the opening shut and ta-da you have a 15-minute coaster/mug rug done!!!
Backing - Bright & Beautiful

Finished in 15!!!

This MugRug will have rounded corners and the edges may be a bit wavy. However, it is the fastest quilted project and is really handy when you need to make a dozen or more. Here is my recommendation - use supercute fabric, bright gorgeous prints that will draw the eye away from wavy edges :-p


As you can see. most of the Diwali day was dedicated to sewing!!! One of the things folks do on Diwali is make Rangoli. A couple years ago, we did too. Here is a picture.
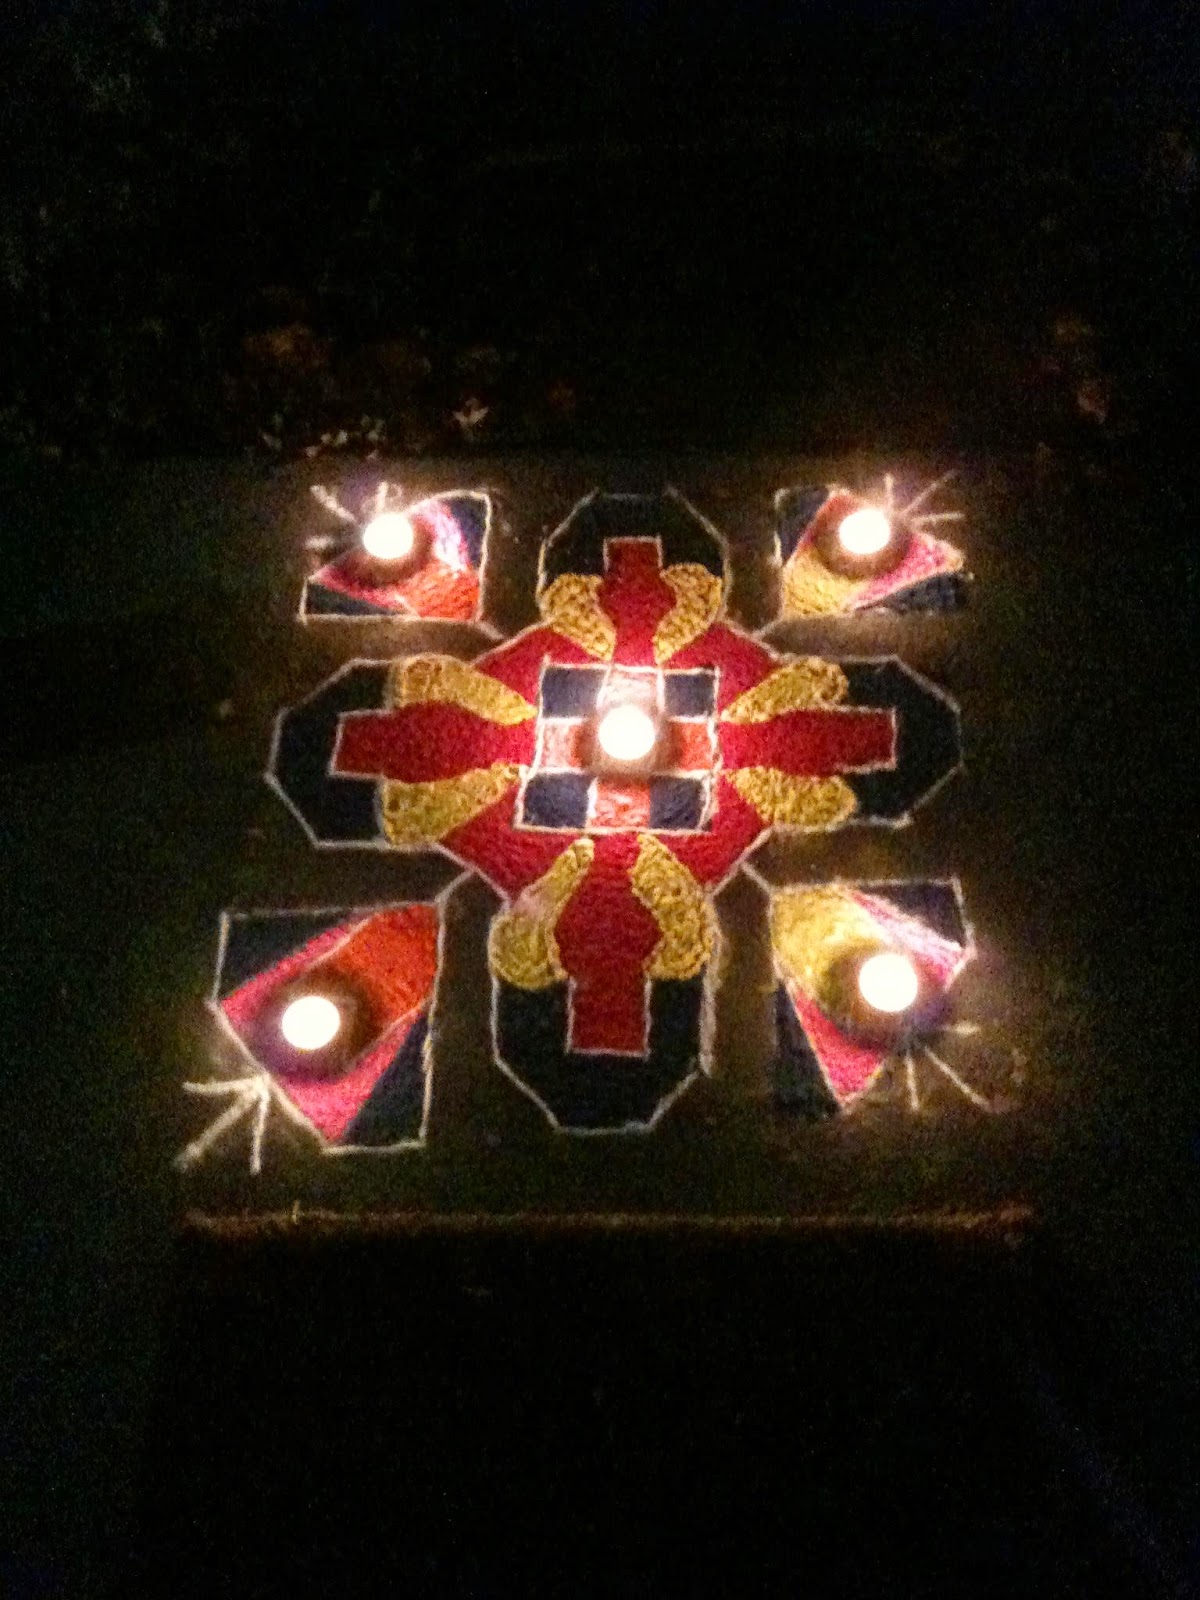
Rangoli (Colored Chalk, Tea Lights) by Paul & Preeti.


This year, as I was busy sewing, I wondered - Hmmm, a Rangoli  would be nice. How about a fabric Rangoli? Something that does not get washed away in the rain or blown away by wind and is beautiful too. And the following happened!!!

I chose the brightest fabric I could find in auspicious colors - red, green and yellow. Fussy cut the pattern. Framed it with a skinny strip of green and added red and gold border mitering the corners.


For the backing I chose this fabric. It is bright, beautiful and the math formulas are correct too. I love that the fabric is extremely nerdy and beautifully bright. I got it in a swap from a very dear friend Jake!!!


Quilted the three layers, and folded the backing fabric onto the front as binding. And here is my finished MugRug. Yes, this one is MINE!!!

Rangoli Mug Rug
This MugRug was a labor of love. Thanks to Jacquie Gering's Class (Walking Foot Quilting Techniques), I "tried" concentric circles quilting. I even added decorative quilting on the green strip. For all the labor and love that went into it, I will selfishly keep it for me.

Quilting Detail

Concentric Circles Quilting

The moment I finished making this one, Paul wanted one. 
Ooh, I like this coaster. May I have one please? And I want that engineering fabric on the back.

Why is that?
Well, it is like you - bright Indian on the front and like me - engineering nerd on the back!!!
With that argument, I was completely floored. So, I did - the 15-minute version of it (Ha Ha Ha). 
Paul's Coaster - Front (like me)

Paul's Coaster - Back (like him)

You will never guess what he said.
He asked for another one. The nerve of that man.
Whatever do you need a SECOND coaster for, I asked.
So that I can keep one here and take the other to work!!!
I happily (almost) made him the second coaster. After all, it only took me 15 minutes!!!

Hey, if you found this blogpost tutorial useful, please give me shout out. I LOVE hearing from you!!!